Using IFTDSS Landscapes in FlamMap
Landscapes edited and downloaded from IFTDSS prior to 30 July 2025 may crash FlamMap Desktop when loaded.
If you still have access to the older landscape in IFTDSS, you can re-edit and download the landscape and it will resolve the issue. If you no longer have access to the landscape in IFTDSS, it can be fixed in ArcPro.
The following fix in ArcPro will remove the EVT, EVC, EVH, or Zone bands. To perform this task:
-
From ArcPro, in the Catalog pane, open the GeoTiff to be altered.

-
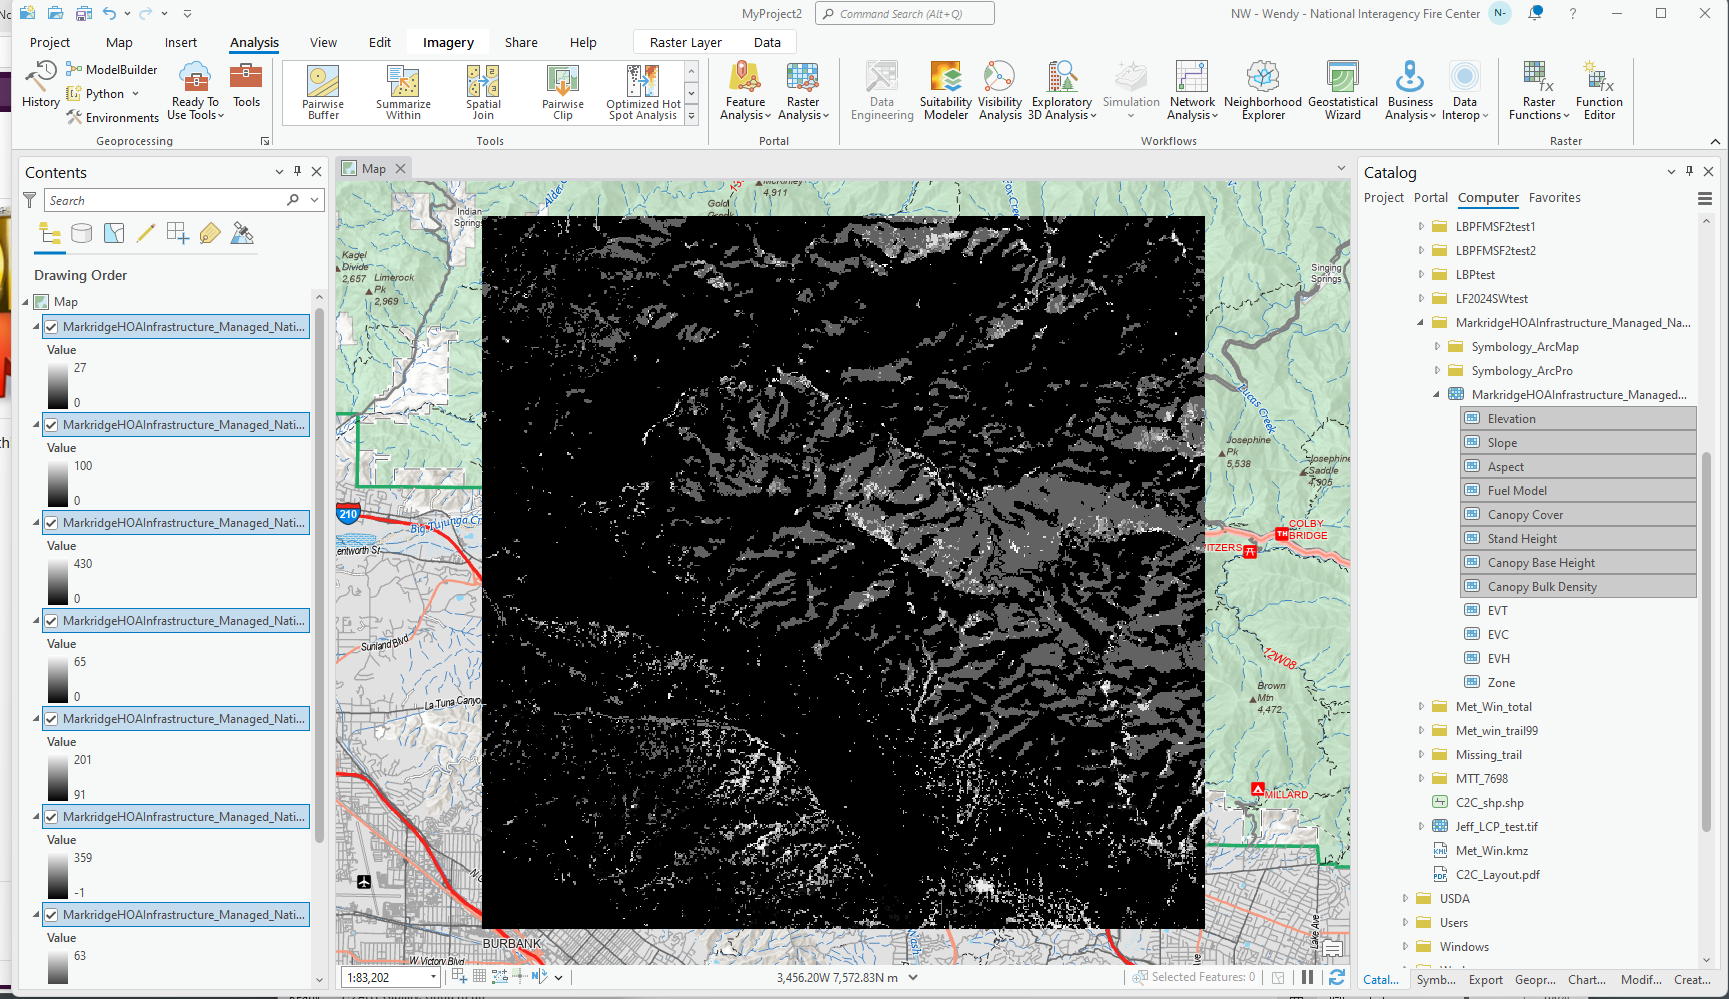
Drag the following layers into the map: elevation, slope, aspect, fuel model, canopy cover, stand height, canopy base height, and canopy bulk density.
-
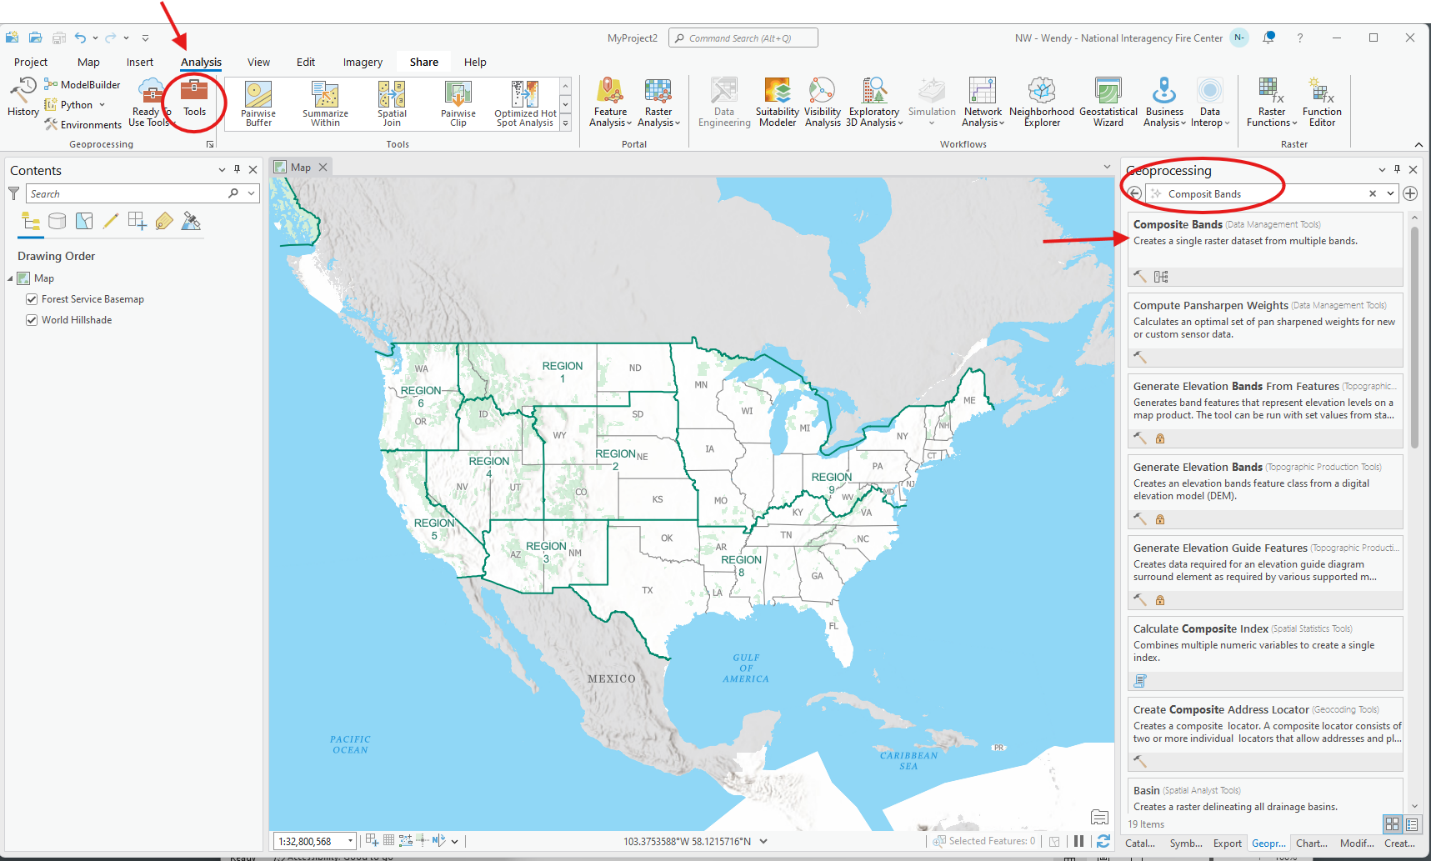
Navigate to the Analysis tab and select Tools. In the Geoprocessing search bar that appears to the right, search for "Composite Bands" and click on the "Composite Bands" search result to open the Composite Bands Geoprocessing pane.
-
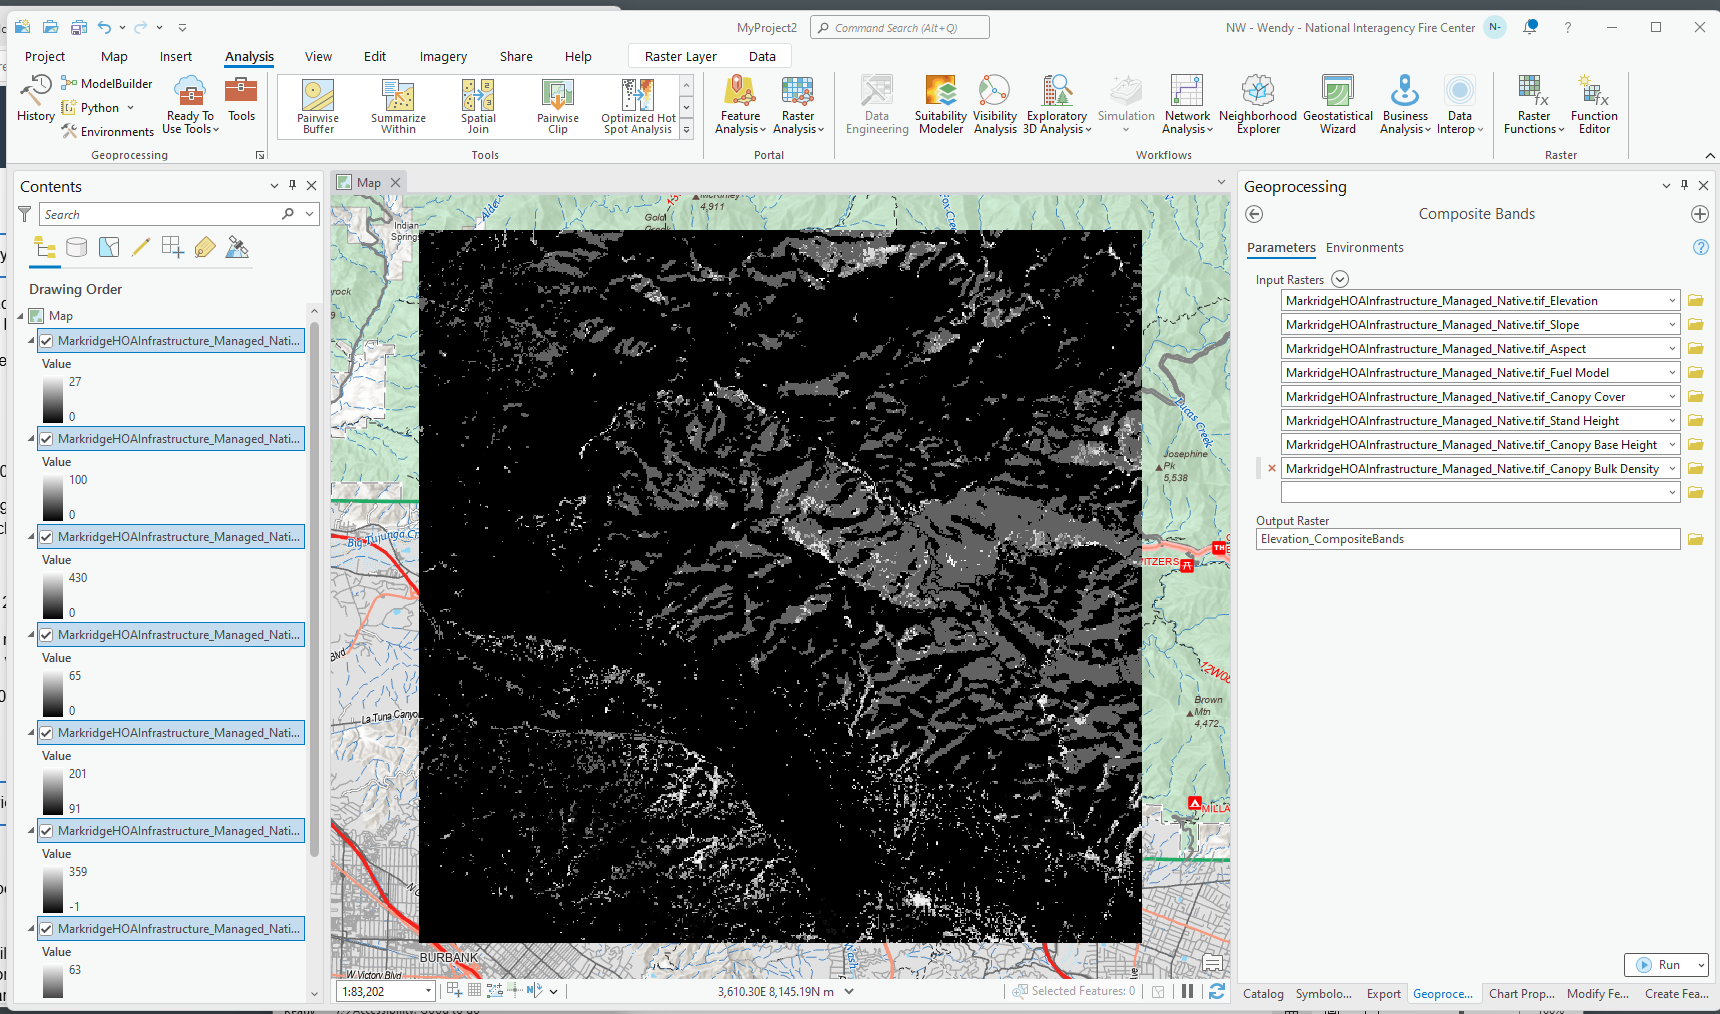
In the Composite Bands geoprocessing pane, click the down arrow next to the input raster search box and add the bands in the following order. This order is important:
-
elevation
-
slope
-
aspect
-
fuel model
-
canopy cover
-
canopy height (stand height)
-
canopy base height
-
canopy bulk density
-
-
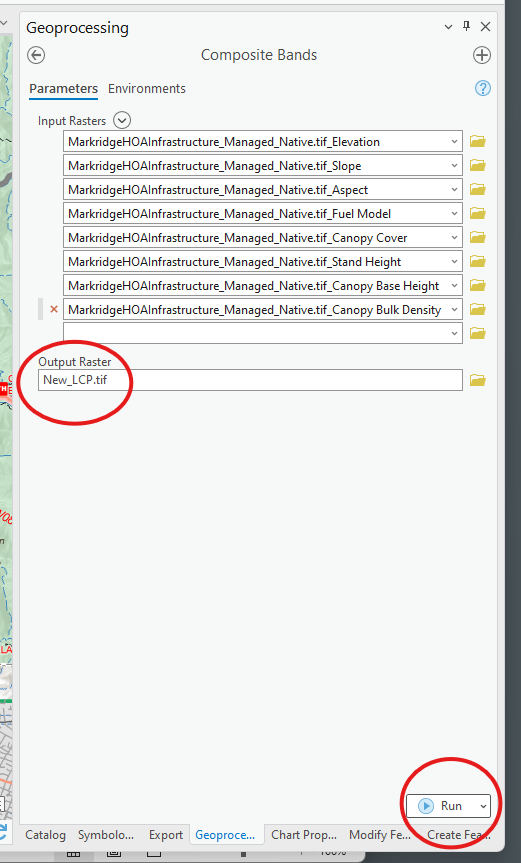
Next, click on the folder icon next to Output Raster and select a location to save the new GeoTiff in. Ensure to add the extension “.tif” to the end of the file name. Then click Run.
-
The newly created landscape will now upload to FlamMap Desktop successfully.