Editing a Landscape to Develop Treatment Alternatives
Landscape Editing can be accessed from the Landscape Evaluation or Implementation stages of the Planning Cycle under Landscape Edit, or within the Strategic Planning stage under Develop Treatment Alternatives. In editing sessions accessed from the Develop Treatment Alternatives, only landscapes matching the extent of the originating landscapes may be selected. Editing sessions accessed outside of Develop Treatment Alternatives have no such restrictions.
In Developing Treatment Alternatives, your Originating Landscape must be an unedited LANDFIRE landscape and the only landscapes available for you to edit must fall within the same landscape extent.
Getting Ready to Edit
Edit Landscape will walk you through editing your landscape based on a default set of rules you select, or a custom set of rules you create.
Here you will edit landscapes to either develop your Existing Condition (EC) if needed, create your treatment alternatives, or make adjustments to previously created landscapes that match the extent of your Originating Landscape.
Whatever the case might be, it is very important to have an Existing Condition to ensure more accurate comparison results to gauge how each alternative does or does not meet objectives. The Existing Condition may need to reflect new disturbances on your landscape, like recent wildfires, fuels treatments, or windfalls.
Below is an image of the editing interface. View a map of your area while editing by clicking the globe icon  at the top left of the page. Rules you select will display at the top of the interface, in the order you select them.

There are two methods available for making landscapes edits, we'll look at each one below:
Important! Be deliberate in the rules you apply when editing landscapes:
-
Rules are applied based on the order in which you add them.
-
A specific attribute for a given cell can only be changed once per editing session.
-
Selection criteria cannot be contingent on another change that is being made in the same editing session.
-
Each attribute is treated separately when applying User Created Edit rules. Editing one attribute, for example fuel model, does not change other attributes, such as canopy cover. Similarly, editing one attribute does not prevent the other attributes from being edited.
Always validate your new landscape to ensure the changes made are what you intended. If you are unsure of the effect of the rules you apply, consider saving a version of your landscape after each edit to allow for easy comparison of the changes made by each edit rule you apply.
For further detail see the Rule Ordering Considerations topic.
Important! If you are using LANDFIRE 2016 data, or data for AK, the Default Fuels Treatment editing method will be unavailable, you must edit that data with User Created rules.
Default Fuel Treatment / Disturbance Edit Rules use previously existing LANDFIRE Lookup tables (LFLU) and Fuel Model Lookup (FMLU) tables. The LFLU tables were created in an effort to improve the LANDFIRE fuels layers between versions. The LFLU tables are used to adjust the fuel attributes of cells, including fuel model, canopy cover, stand height, canopy base height, and canopy bulk density, based on the type and intensity of treatment or disturbance and the time that has elapsed since that treatment or disturbance. For more technical details on these rules, see Default Edit Rule Technical Documentation.

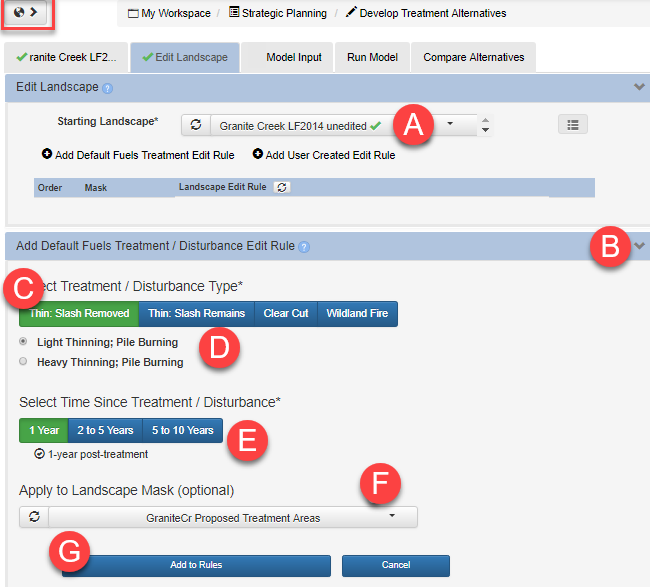
To edit with Default Fuels Treatment/Disturbance Edit Rules:
- Double check that your landscape is selected.
-
Make sure the Add Default Fuels Treatment/Disturbance Edit Rule heading is open (if not, click the arrow next to the tab heading).

- Select a treatment or disturbance.
- Use the radio buttons (if applicable) to further specify treatment details.
- Select the time since disturbance.
- (Optional) select a landscape mask to constrain your rule application to a specific area.
-
Click the Add to Rules button
-
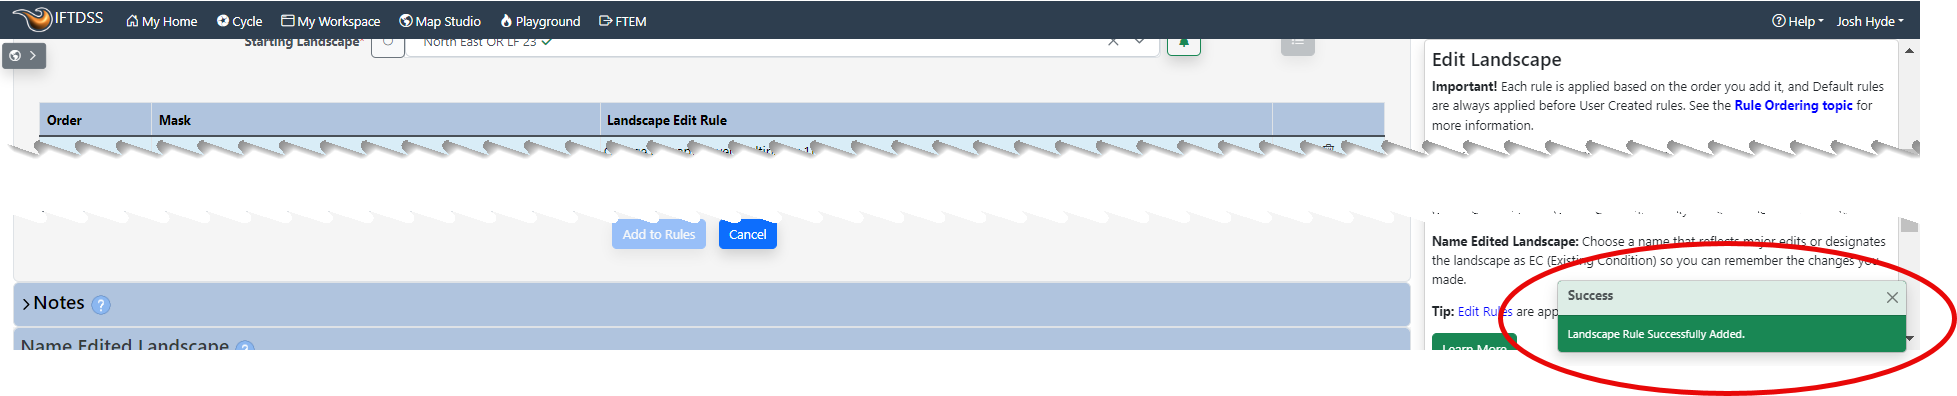
After clicking the Add to Rules button, a notification appears to confirm the rule had been added. You can continue to add rules before saving your landscape. Rules are implemented in the order you add them, for further detail see Rule Ordering Considerations.
- (Optional) You may add a note about this edit session, up to 512 characters, that will be visible from My Workspace when the edited landscape is selected.
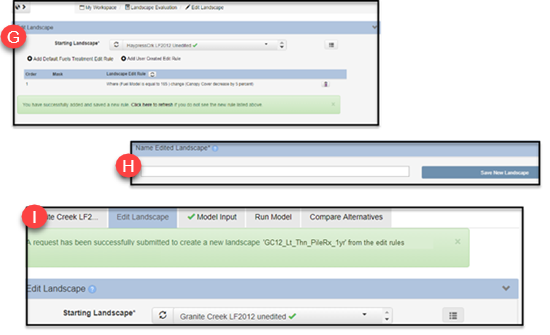
- Once you are finished editing, scroll to the bottom of the screen, name the landscape so its easy to see what treatment it represents (e.g. GC12 Lt Thn PileRx 1yr), and click Save New Landscape.
-
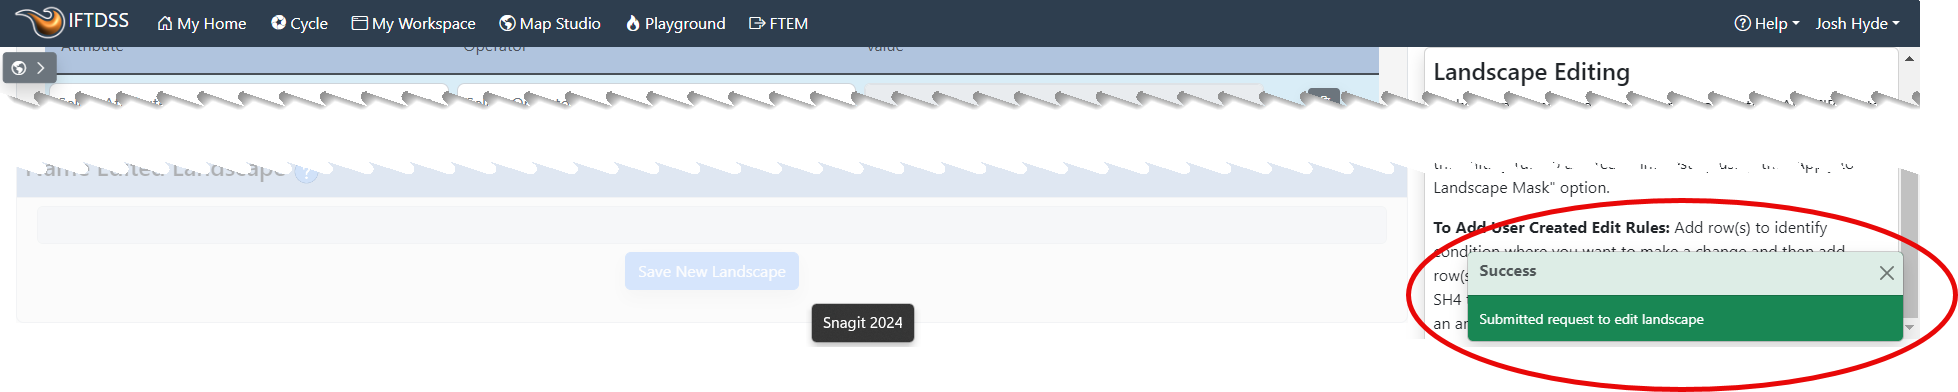
Once the new landscape is saved, a notification will appear in the bottom right of the screen that confirms it has been successfully submitted.
Tip: If you hover your mouse over the “Light Thinning; Pile Burning” it will give you the details on what the rule represents. They are also listed in the Treatment Rule Background
Important! It is recommended to keep the landscape names around 30 characters in length for later reporting steps to run smoothly in the IFTDSS system.
Tip: When clicking on landscape files that have been edited in My Workspace, you will see an option to View Edit Rules. This displays the edits that were made on that landscape.
Important! Be deliberate in the rules you apply when editing landscapes:
-
Rules are applied based on the order in which you add them.
-
A specific attribute for a given cell can only be changed once per editing session.
-
Selection criteria cannot be contingent on another change that is being made in the same editing session.
-
Each attribute is treated separately when applying User Created Edit rules. Editing one attribute, for example fuel model, does not change other attributes, such as canopy cover. Similarly, editing one attribute does not prevent the other attributes from being edited.
Always validate your new landscape to ensure the changes made are what you intended. If you are unsure of the effect of the rules you apply, consider saving a version of your landscape after each edit to allow for easy comparison of the changes made by each edit rule you apply.
For further detail see the Rule Ordering Considerations topic.
- Choose the Starting Landscape you want to edit.
- Click the Add User Created Edit Rule to view the rule options.
-
Specify the conditions you would like to select in the fields below Where these conditions exist. In this example we have selected "Fuel Model" as the Attribute, "is equal to" as the Operator and fire behavior fuel model "165 (TU5)" as the Value. This selected all TU5 fuel modeled areas.
Tip: Need a quick comparison of fuel models? If so, try downloading the Fuel Model Comparison spreadsheet.
- Specify the conditions you would like to change by populating the fields below Modify the following values. In the example pictured here we have selected "Canopy Cover" as the Attribute, "decrease by" as the Operator, and "5" (for 5 percent) as the Value. For all TU5 fuel modeled areas, the application decreases the canopy cover by 5 percent.
- The Apply to Landscape Mask (optional) dropdown allows you to constrain your edits to the area within a mask of your choosing. When this field is left blank, the edits are applied to the entire landscape.
-
When you are ready to apply this rule select Add to Rules.
Tip: When working with canopy cover 'percent', IFTDSS uses percentage points. For example, decreasing 55% cover by 50 will result in 5% cover. Looking for an easy way to decrease canopy cover by half? Multiply the canopy cover by 0.5.

- When added, the rule will appear in a list at the top of page, just under the Starting Landscape field, and the order will be noted if you have multiple rules. You can delete rules before saving by using the delete button
 to the right of each rule. Rules are applied top to bottom in the order in which you add them. You may continue to create and apply rules, or name or save your landscape if you are finished.
 - (Optional) You may add a note about this edit session, up to 512 characters, that will be visible from My Workspace when the edited landscape is selected.
- Give your landscape a descriptive name so you will know what edits were made, and click the Save New Landscape button.
-
You will see a confirmation that your landscape has been saved.