Add and Save a Shapefile in Map Studio
Use the Upload Shapefile widget ![]() to upload a shapefile to the IFTDSS Map Studio and save it to IFTDSS.
to upload a shapefile to the IFTDSS Map Studio and save it to IFTDSS.
Important! Shapefiles added to Map Studio must:
-
Be zipped as a .zip file.
-
Contain the .shp, .shx, .dbf, and .prj files.
-
Not have nested folders within the zipfile.
-
Not use any special characters such as "." in the file name.
- Click the Upload Shapefile widget
 along the bottom of Map Studio to open the widget.
 -
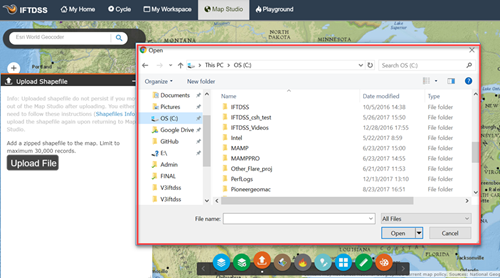
Click Upload. A browser box will open allowing you to search your local files. Select the desired shapefile. Shapefiles must be zipped to be uploaded and contain .shp, .shx, .dbf., and .prj files.
Note: Large or complex shapefiles may take longer to load as IFTDSS reprojects the file and repairs geometery if needed.
Tip: You can cancel the upload, if needed, at anytime by clicking the Cancel button.
-
Use the checkboxes to select the attributes you wish to import. You may choose up to 10.
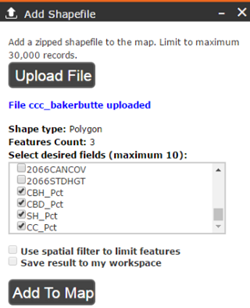
- The option to "Save the shapefile to my workspace" is selected by default. If you do not want to save this shapefile to your Workspace for later use, uncheck this option.
- Give the shapefile a descriptive name.
- Specify the folder in which to store the shapefile.
-
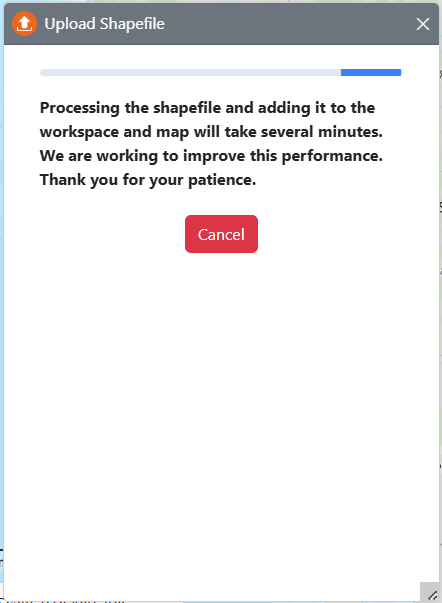
Click Create. You will notice a progress bar as the shapefile uploads.
-
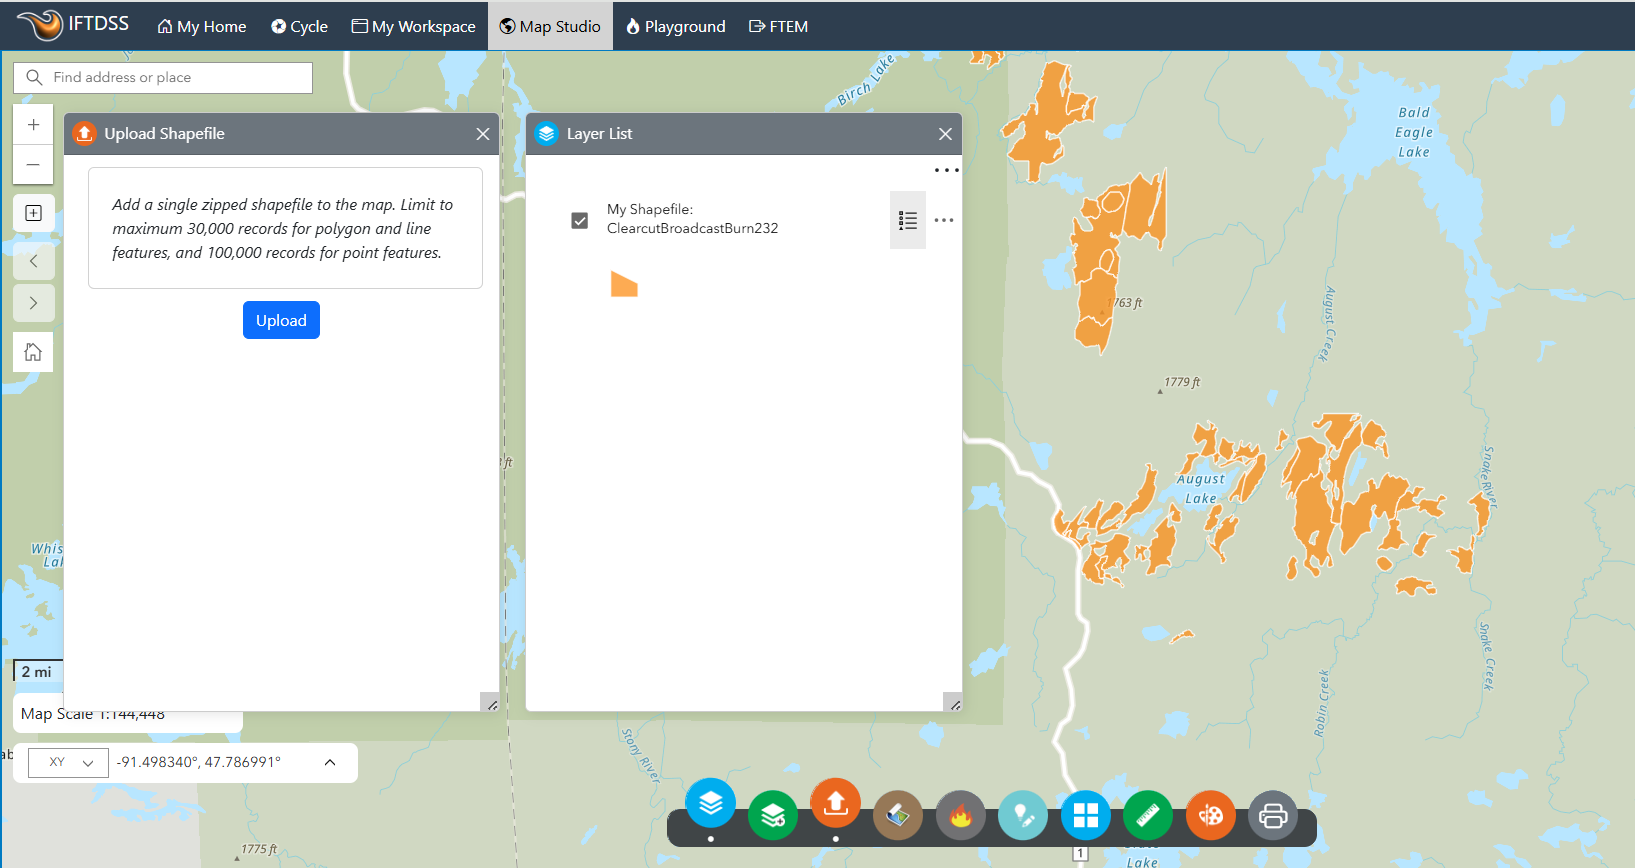
When completed, the Layer List widget will open and the map will automatically will zoom to the newly uploaded shapefile.
Shapefiles may be added to IFTDSS by uploading a .zip file containing the .shp, .shx, .dbf, and .prj files to Map Studio. When you add a shapefile, Map Studio converts it to a format that web clients can quickly read and display. To help further improve the performance of the display, you can choose to generalize the features in your shapefile. Generalizing reduces the size of the shapefile by simplifying the features and is often appropriate for data at small scales.
Generalized display
Shapefiles often contain large features with a lot of associated data. Smaller features with less data are often necessary for the shapefile to display properly over the web. Generalizing the features is one way to reduce the size of the shapefile and therefore improve web display. You can generalize the features using a desktop application such as ArcMap or you can have Map Studio do the generalization when you add the file to your map. Generalizing reduces the precision of the shapefile layer to approximately 1 meter in Web Mercator and will remove vertices within 10 meters in Web Mercator. This should maintain an informative and accurate display of your features while reducing the overall size of your data and allowing your layer to quickly display in the map.
Generalizing doesn't work well on coincident polygon features intended for large-scale display because it will create some slivers in the polygons. For coincident polygons at large scales, you can choose to maintain the features if you have a relatively small amount of data, or if you have a large amount of data, you can publish a feature service to a GIS Server site. If you have publishing privileges in your organization, you can also create feature layers by publishing features.
Best practices for adding shapefiles
Shapefiles were originally created to perform geoprocessing on desktop apps. They are now supported in a number of web browser clients including Map Studio. There are some limits to what web browser clients can support.
Below are best practices for using shapefiles in Map Studio:
- Choose to generalize features for web display if you have a large amount of features intended to be displayed at small scales and you have not already generalized your vertices in ArcGIS Desktop.
- Create a .zip file that contains the .shp, .shx, .dbf, and .prj files that comprise the shapefile.
- Store your shapefile directly in the root (the central directory) of the .zip archive and not in directories within the archive. If your .zip file viewer shows path information, the path should be blank.
- The name of the new layer should be the same as the name of the .zip file you added. You can rename the file before adding to the map, or rename the layer once it is part of the map.
- Add standard compressed archive .zip files.
- Include no more than 30,000 shapefile features in your file.
- In some cases, when you attempt to add a file with fewer than 1,000 features, you may see an error message that the shapefile is too big to add to the map. This occurs when the extracted data is too big to display in a web browser or the file is larger than 10 MB. Often, generalizing the features will reduce the overall size and allow the shapefile to be added to the map. If that doesn't work, you may need to create a feature service with ArcGIS Server. If you have publishing privileges in your organization, you can create feature layers by publishing features. You can try breaking up your features into multiple shapefiles, but this may result in a map that takes a long time to display.
- The shapefile should contain valid geometries. If you have ArcMap, you can use the Repair Geometry geoprocessing tool to correct invalid geometries in shapefiles.
- Include in the shapefile the accompanying .prj file in which the coordinate system of the data is defined. If you have ArcMap, you can define the coordinate system of a shapefile, which creates an appropriate .prj file for the shapefile.
Limitations
The following limitations apply to using shapefiles in Map Studio:
- Compression formats other than a .zip archive are not supported.
- The shapefile must be less than 10 MB in size.
- The following features are not supported: multipatch or multipoint geometries, geometries that cross the dateline, or self-intersections in polygons. Shapefiles with these features cannot be added to a map.
- Shapefiles cannot be dragged directly onto Map Studio; you must use the Upload Shapefile widget in the Map Studio.
Shapefiles that are created or zipped with Mac's Finder, may contain a hidden folder that results in an "Unable to Complete Operation" error when you attempt to add it to Map Studio with the Upload Shapefile widget ![]() .
.

To fix this issue, unzip the shapefile in Finder. Next, re-zip the shape using a 3rd party application. The newly zipped shapefile should now successfully upload.
