Create a Buffer to Summarize Fuels and Fire Behavior
When creating summary reports to assess your burn units, you may want to also assess the area outside of the burn units for containment, contingency planning, or other reasons.
Below, we describe two methods to create a polygon that may be used as a mask or area of interest when creating summary reports of the area surrounding a burn unit. The first method shows how to do this in IFTDSS Map Studio with a shape, the second shows how to create a shapefile in ArcPro and import it to IFTDSS.
-
Create a buffer shape in IFTDSS Map Studio - This will create a hand-drawn buffer area of approximate distance.
-
Create a buffer shapefile in ArcPro and import to IFTDSS Map Studio - This will create a calculated buffer with a specific distance.
Create a buffer shape in IFTDSS Map Studio
-
Start from Map Studio with your burn unit visible and plenty of landscape around it draw a buffer.
Tip: You may use the Measure
 widget to gauge the approximate distance around your burn unit.
 -
Open the Create/Edit Shapes
 widget, select "Polygon," and choose your drawing method, either "polygon " or "freehand polygon".
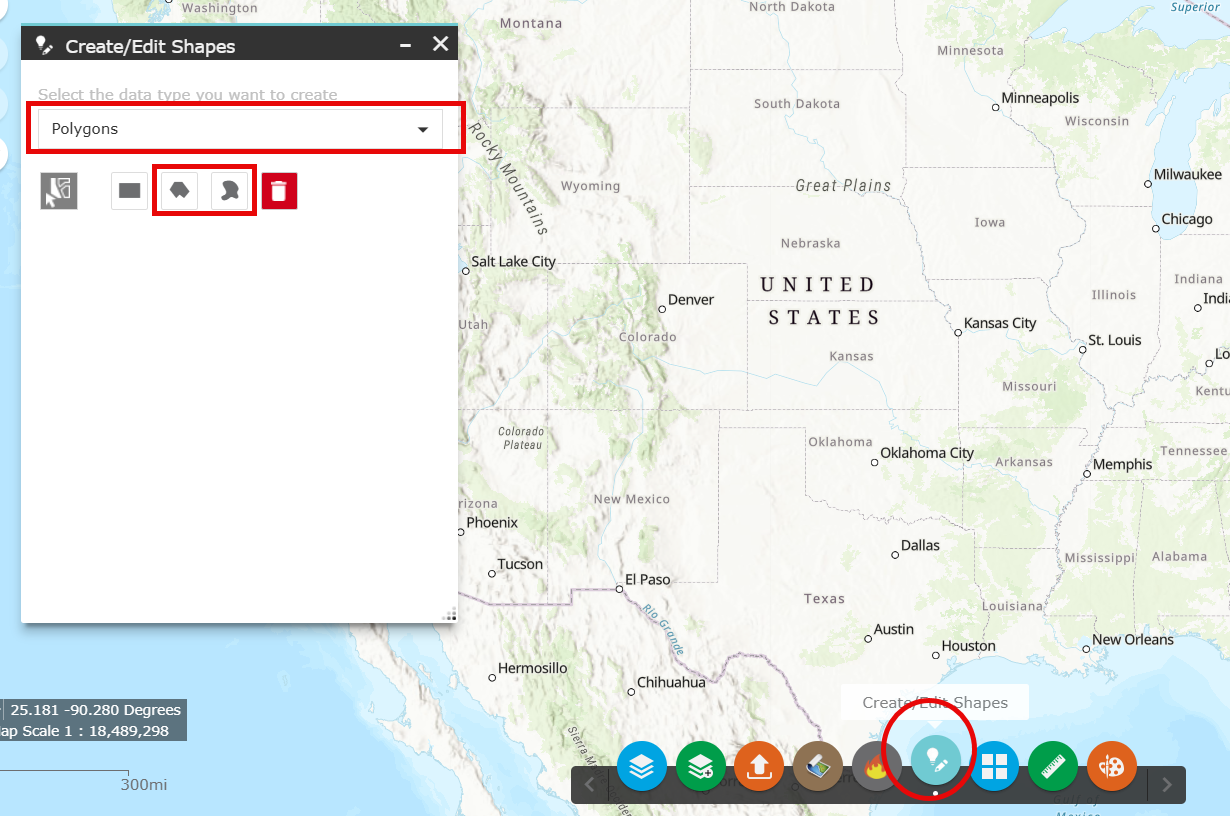
-
Draw a "U" or "C" shape around your burn unit. Start drawing the outer perimeter. Just before completing the outer perimeter, move the cursor down and outline the perimeter of your burn unit, then complete the shape just before connecting. Refer to the GIF below for a visual example.
-
Give the buffer a name, select a folder to store it in, and click Create.
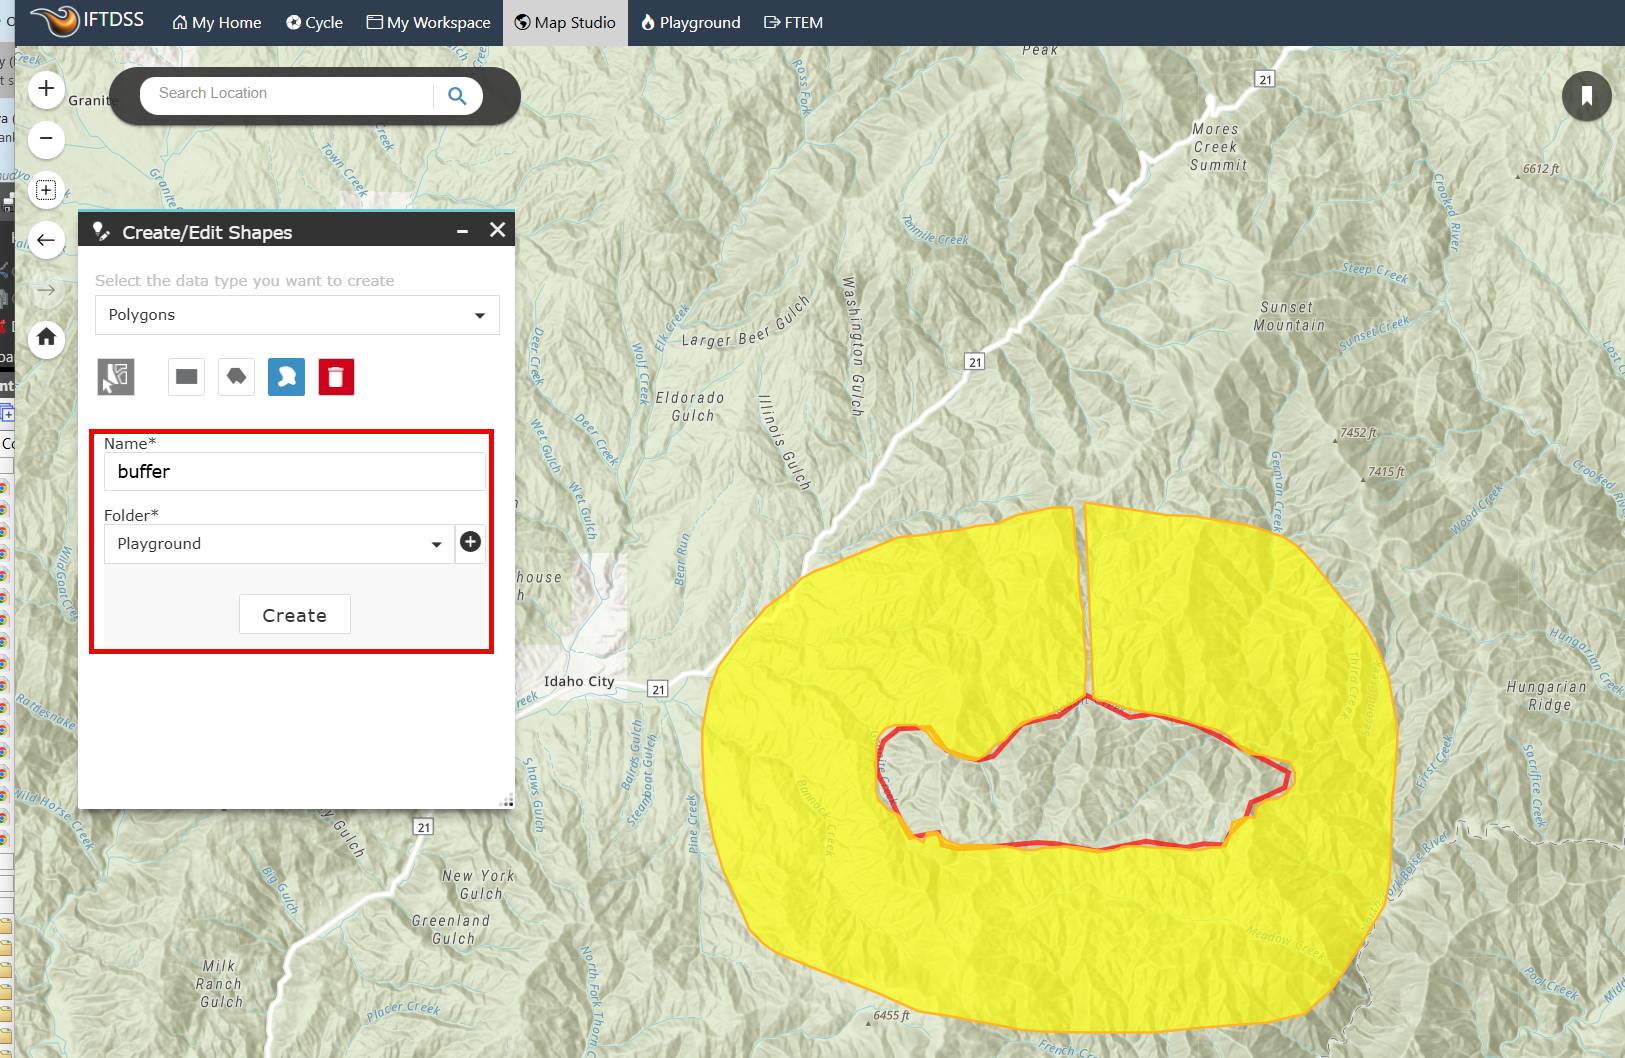
This buffer shape will now be available to use as a mask or area of interest throughout IFTDSS.
Create a buffer shapefile in ArcPro and import to IFTDSS Map Studio
Part 1 - Create the buffer shape in ArcPro
-
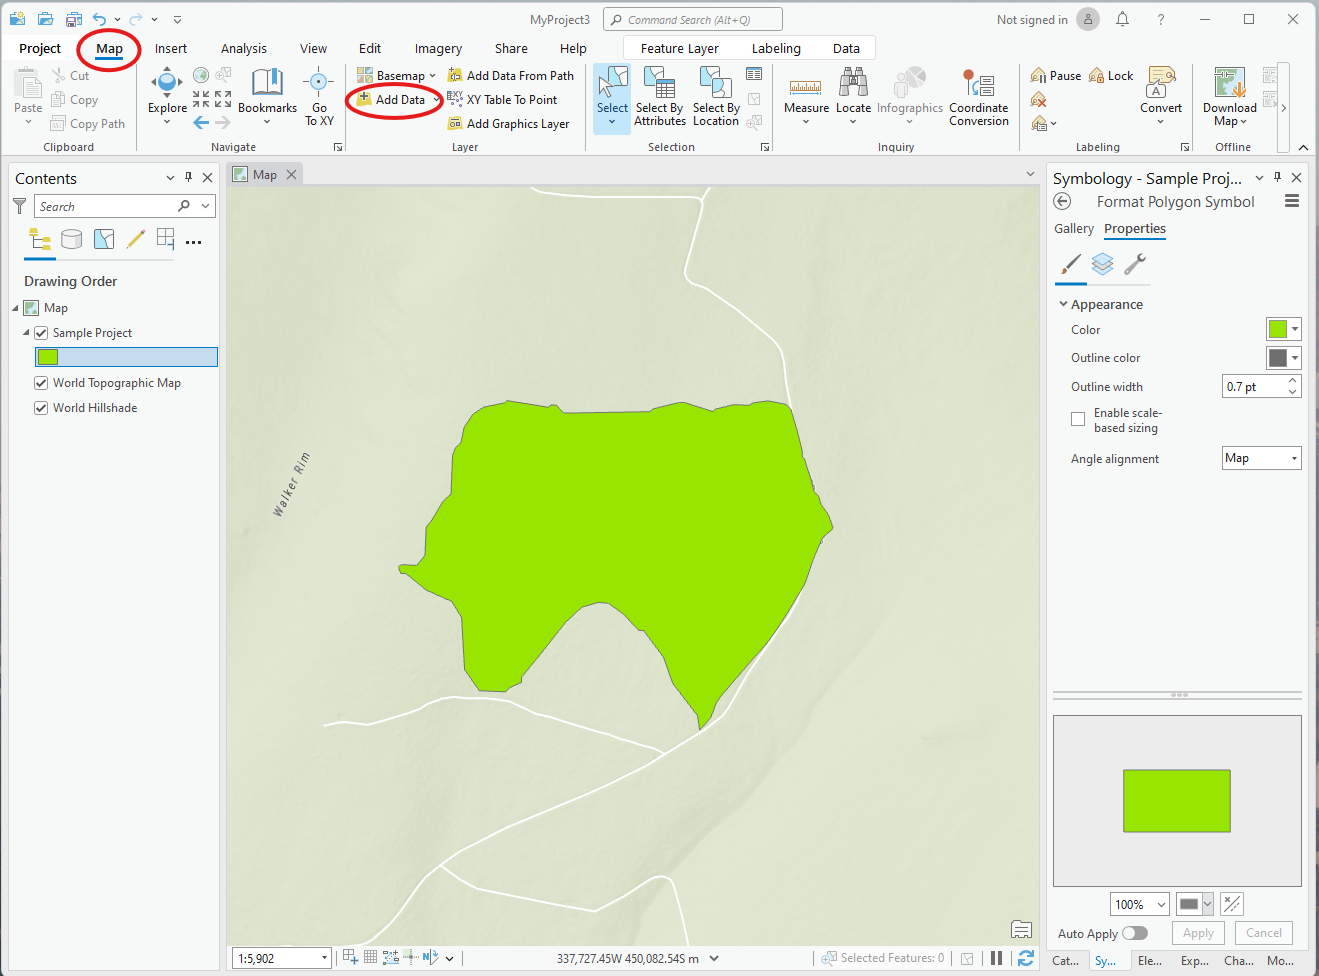
Open ArcPro and select the Map tab.
-
From the Layer panel, click Add Data.
-
Navigate to the shapefile you wish to buffer and click “Ok” to add to map.
-
At the top of your ArcPro window, click the Command Search field and type “Buffer.”
-
From the dropdown, select Buffer (Analysis Tools) to open the Geoprocessing Buffer window.

-
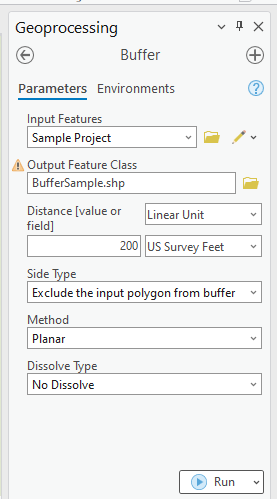
Fill out the needed inputs as outlined below:
-
Input Feature: This is the polygon you wish to buffer.
-
Output Feature Class: This is the name and location for your new buffer polygon, use the folder icon to assign a specific location on your computer to save the new buffer shapefile.
-
Distance: Start with the drop down that says “Unknown” to select the units, in this example we use "feet". Next, enter the number of units in the empty field to the left, for example "200" will create a 200-foot-wide buffer.
-
Side Type: From the dropdown menu select “Exclude the input polygon from the buffer.”
-
-
Click Run to create the buffer.
-
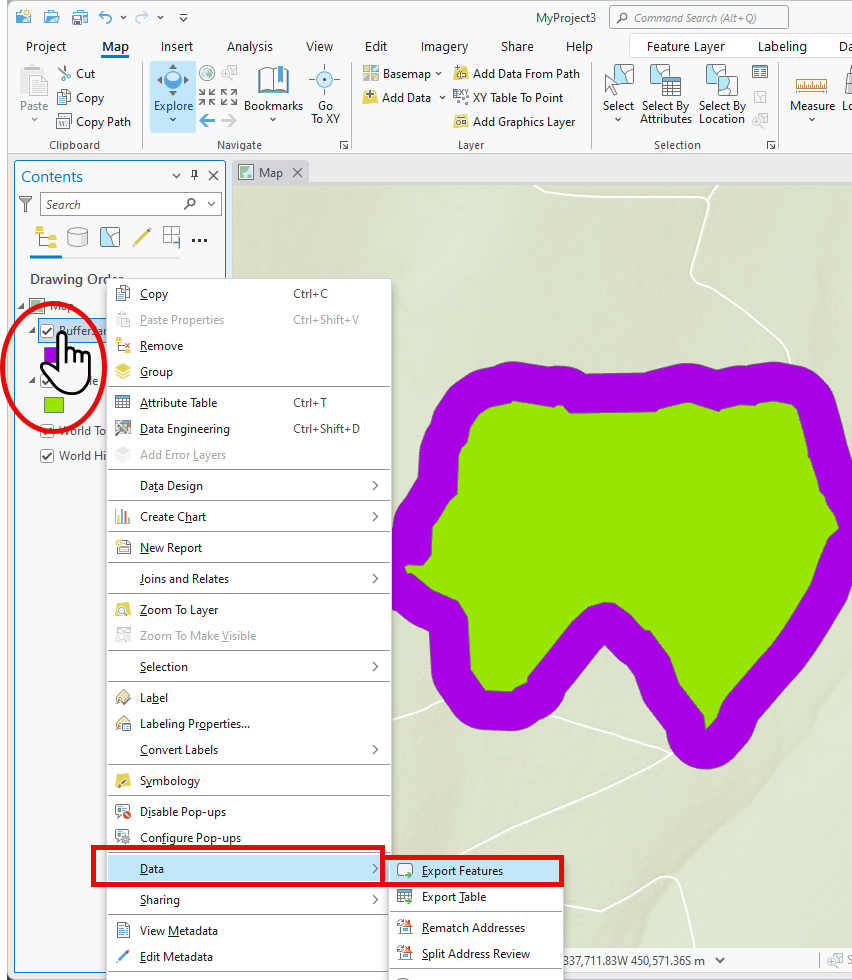
From the Contents pane, right click the buffer polygon to open options. Hover over Data and select Export Features to open the Export Features window.
-
From the Export Features window, select the following:
-
Input Features: Use the drop down to select the buffer polygon.
-
Output Feature Class: Use the folder icon to select the location to save the polygon and to give the polygon a name.
-
-
Click Ok to export the buffer as a shapefile.
-
With the shapefile saved, you may save and close your ArcPro session.
Part 2 - Zip the shapefile for use in IFTDSS
Shapefiles must be zipped before being uploaded to IFTDSS. To zip the shapefile:
-
Navigate to folder where you saved your shapefiles.
-
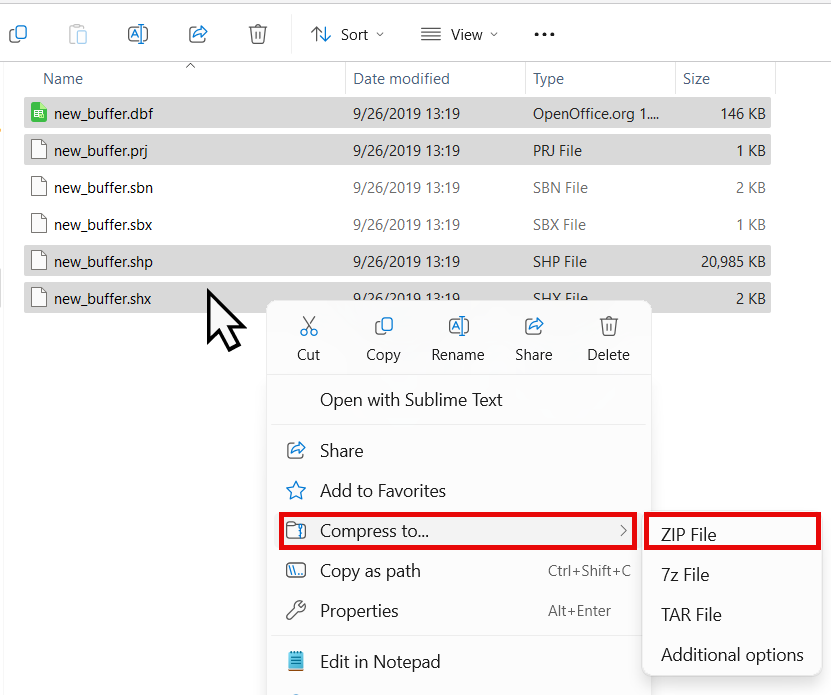
Select the individual files from you shapefile:
IFTDSS must have at least the .shp, .shx, .dbf, and .prj files. Alternatively, you may select all individual files with the exception of any “LOCK Files”, listed under File Type. (The "LOCK" indicates those files are being used somewhere).
-
If using Windows 11, right click the selected files, hover over the Compress to option then select Zip File.
-
The new zipped folder will appear in your file list. You may have the option to edit the name field before, alternatively, you may click the Enter key to finish the process.

If using other versions of Windows, you may want to visit the Windows support page for zipping and unzipping files for specifics on your version of Windows.
The newly zipped file is now ready for upload to IFTDSS.
Part 3 - Import the shapefile to IFTDSS
Open IFTDSS and navigate to Map Studio.
- Click the Upload Shapefile widget
 along the bottom of Map Studio to open the widget.
 -
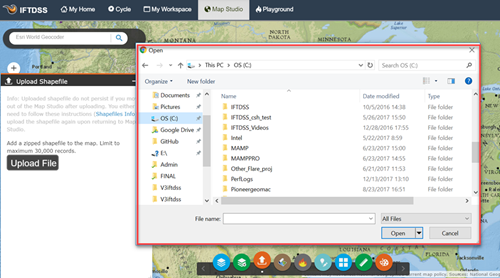
Click Upload File. A browser box will open allowing you to search your local files. Select the desired shapefile. Shapefiles must be zipped to be uploaded and contain .shp, .shx, .dbf., and .prj files.
Note: Large or complex shapefiles may take longer to load as IFTDSS reprojects the file and repairs geometery if needed.
Tip: You can cancel the upload, if needed, at anytime by clicking the Cancel button.
-
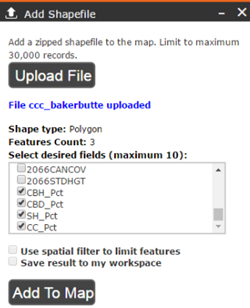
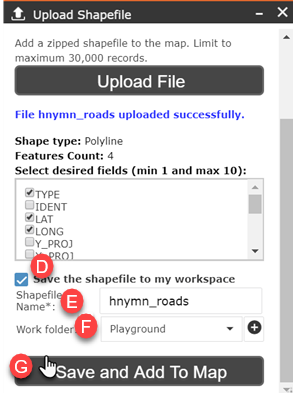
Use the checkbox to select the attributes you wish to import. You may choose up to 10.
- The "Save" option is checked by default. If you do not want to save this shapefile to your Workspace for later use, uncheck this option.
- Give the shapefile a descriptive name.
- Specify the folder in which to store the shapefile.
-
Click Save and Add to Map.
-
When completed, a confirmation message will appear to verify the shapefile has been uploaded.
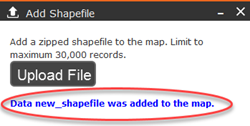
This buffer shape will now be available to use as a mask or area of interest throughout IFTDSS.