When working with IFTDSS GeoTIFF data in other products, you may notice the data is displayed a\\ as a range of values, not classes. We have included instructions on how to reclassify the data for further analysis in ArcMap. The below example focuses on the flame length, but the same steps are applicable for other outputs as well. You will need the Spatial Analyst Extension for ArcGIS and it will need to be turned on.
-
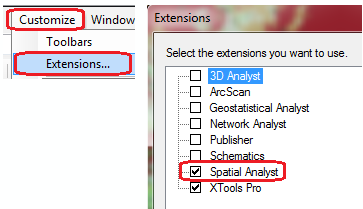
Verify you have the Spatial Analyst Extension. In the main ArcMap toolbar go to Customize and then select Extensions. When the Extensions window opens, verify Spatial Analyst is listed, available, and is checked.
-
Add the Flame Length band from the GeoTIFF. Using the Add data button, navigate to your GeoTIFF, double click the tiff file to show the individual bands. Select "Flame Length."

-
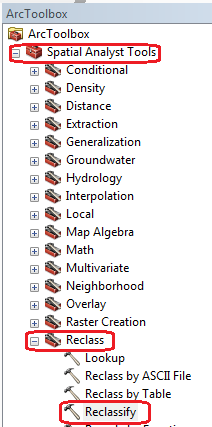
Open ArcToolbox and navigate to the Reclassify tool by navigating to Spatial Analyst Tools and then Reclass.
-
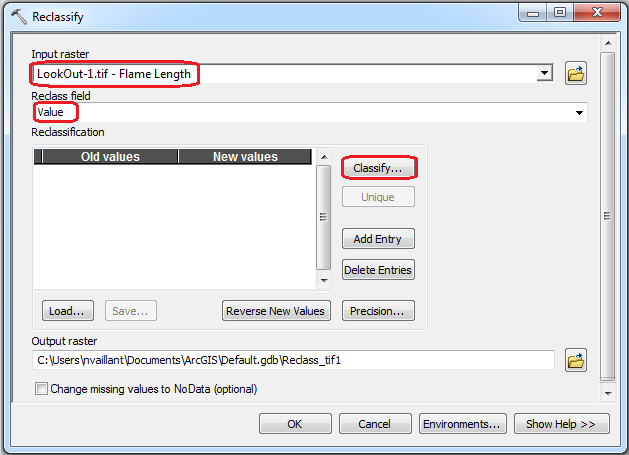
When the Reclassify window opens, select the Flame Length band as the Input Raster. Verify the Reclass field is set to "Value" and click Classify.
-
In the Classification window you will need to set the Classes to 7. Do this step first otherwise you can’t change it once you start setting the Break Values. Then set the Break Values using the conversion table provided below to match the IFTDSS bins. To do this you click on the value in the box and type what you want. Leave the maximum value what it is for your data, not what is in the image. Then click OK.
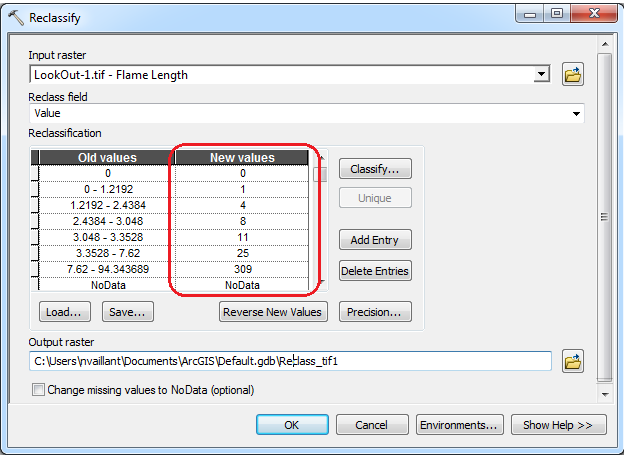
Conversion table of meters to feet. Flame length (meters) Flame length (feet) 0 0 0.3048 1 1.2192 4 2.4384 8 3.3528 11 7.62 25 Max value Max value 
-
In the Reclassify window. Change your New Values to be something meaningful to you to represent the new classification. One suggestion is using the maximum value in the classes they represent.
-
Go to the Output raster option to name and save it where you would like. Because it is a raster, you are limited to 13 characters for the name and the only special character you can use is an underscore.
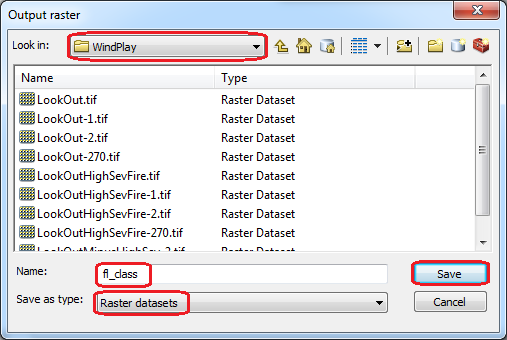
- When the Reclassify screen opens, click OK to generate your new raster.
-
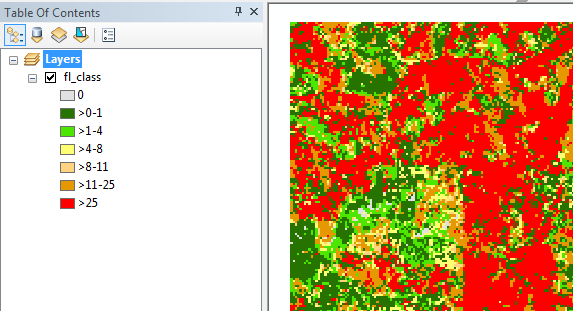
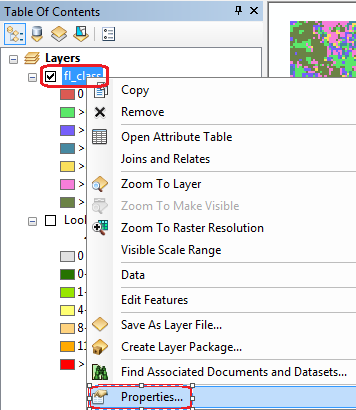
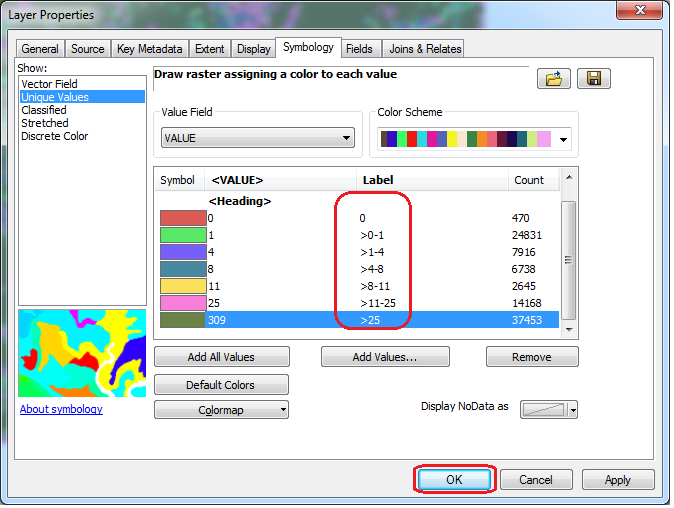
You can change the labels by right clicking on the layer name in the table of contents, choosing Properties, and then the Symbology tab. Then typing the Label you would like.
-
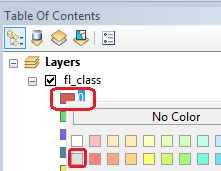
Finally, you can change the colors of your new symbols by right clicking on each class and choosing the color you would like.