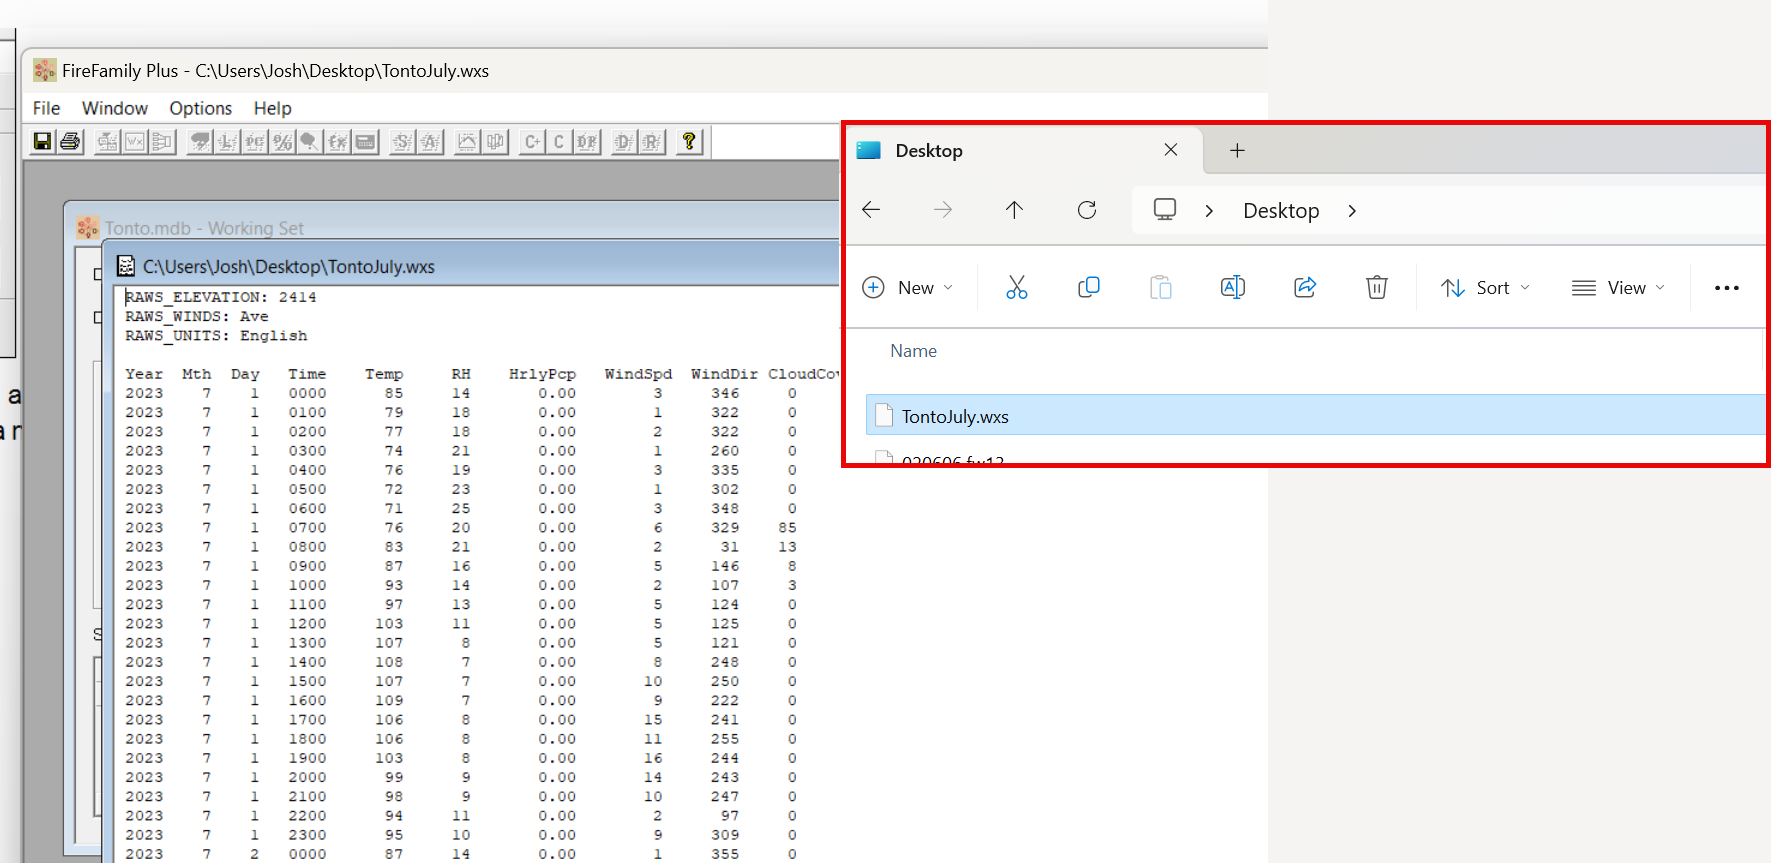
In IFTDSS you have the option of conditioning initial fuel moistures by uploading your own weather stream (.wxs) file. If you do not have a .wxs file and need to create one, this tutorial walks through the creation of a .wxs file for use in IFTDSS. First you will download historical hourly weather data (FW13 or FW21 file), then use FireFamilyPlus to create the .wxs.
Important! If an .wxs file is imported into IFTDSS it must meet the following requirements to run successfully:
- Data must be hourly format (each row representing one hour).
- Data must be in chronological order.
- Data may only have gaps of 3 hours or less.
- A day is defined as a 24 hour period, it doesn’t need to be midnight to midnight.
- User can’t upload less than 1 day of data.
- User can only upload 31 days of data.
- User can condition for 1 - 7 days.
Downloading hourly weather data
To download historic hourly weather data, use one of the sources below and follow the steps to download your data:
FEMS
Important! Weather data prior to January 1st, 2023 is provisional, review for accuracy prior to using for decision purposes.
URL: https://fems.fs2c.usda.gov/ui
-
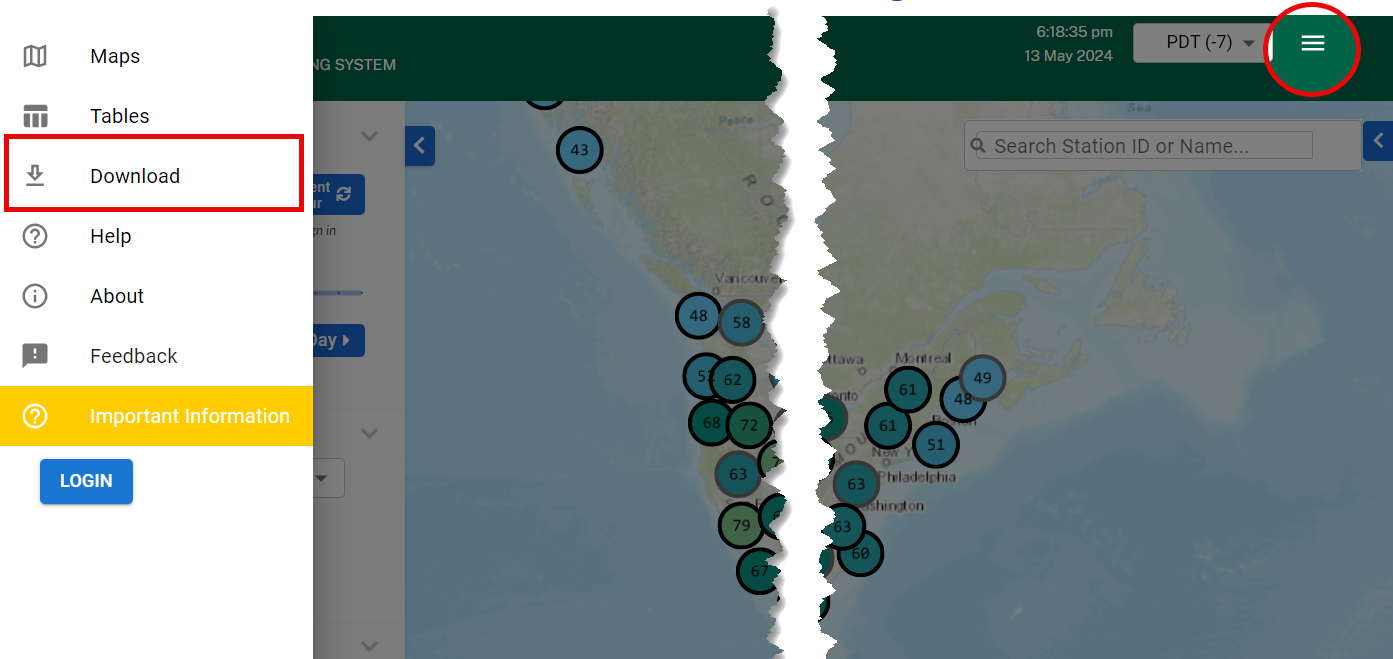
Click the menu icon in the top right and select Download to go to the FEMS Data Download page.
-
Select your data by specifying the following:
-
Data Subject Area: Weather
-
Data Set: Weather Observation
-
Data Formal: FW21
-
In the remaining fields, specify the dates, times and station(s).
-
-
Click Download Data.
Tip: In the near future, a new version of gap-filled data will become available.
WFAS
URL: https://www.wfas.net/nfdrs2016/maps/
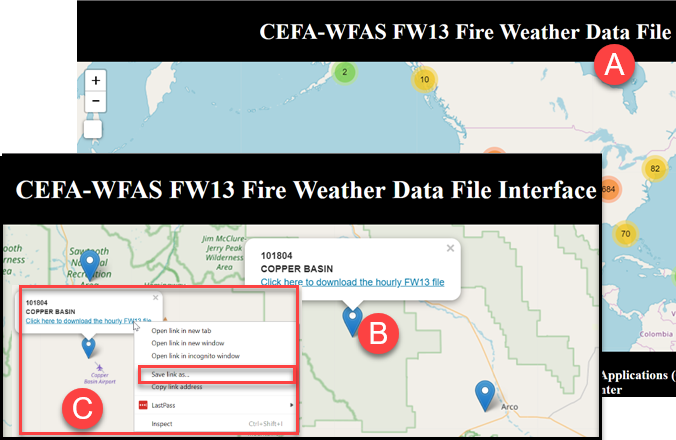
- From the map, zoom into your Area of Interest and find the location of your station.
- Click the point to show the station.
-
Save the file to your local machine without opening it by right clicking the station link, select "Save link as" and save the data to your local machine.
CEFA
URL: https://cefa.dri.edu/raws/
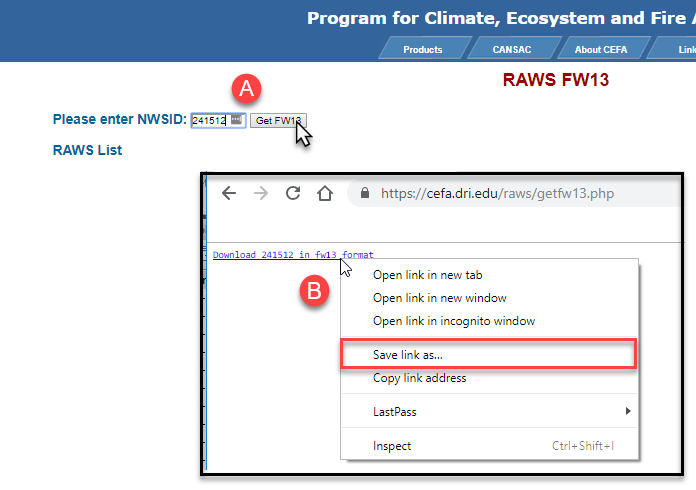
- Enter the Station ID and click Get FW13. If needed, use the RAWS list option to look up the station ID number.
-
Right click the download link. Save the file to your local machine without opening it by clicking “Save link as” to save the file. Give the file a name, and click “OK”.
Create a .wxs file in Fire Family Plus
The follow steps walk through the creation of a .wxs file using the FW13 or FW21 data you have downloaded, and importing it into the Fire Family Plus 5.0 application.
Important! Important: You must be using Version 5.0 or above for the step below to work:
Visit the FireFamilyPlus Software download page to download the Fire Family Plus.
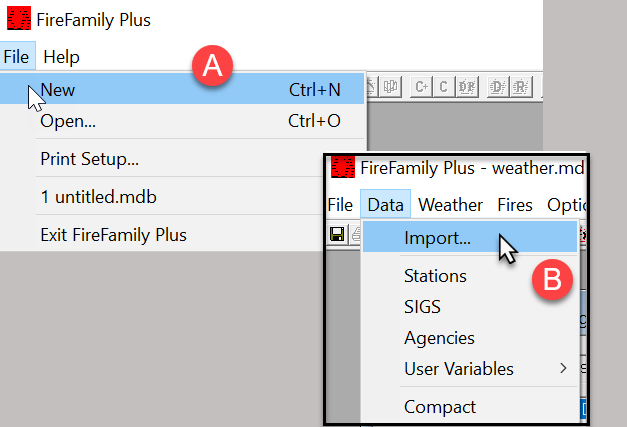
- Open Fire Family Plus, go to File in the top left, select New to create, name, and save a new Fire Family Plus (.mdb) file.
-
Go to the Data tab and select Import to import your FW13 file.
-
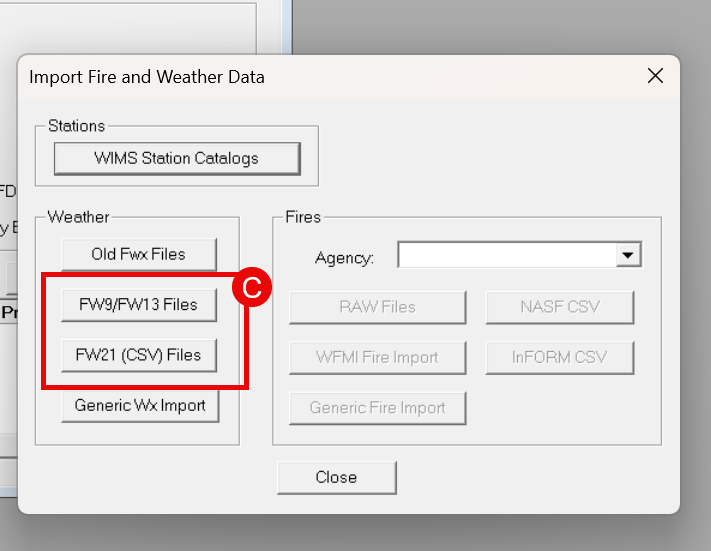
Click FW9/FW13 Files or FW21 Files, depending upon your file type to open the import pane.
-
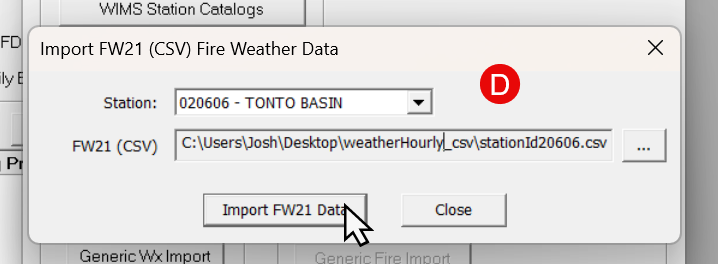
Select your station name from the dropdown and select the weather file from your local machine, then click the Import button. If you are asked whether or not to let Fire Family Plus overwrite existing records, choose “No” and continue.
-
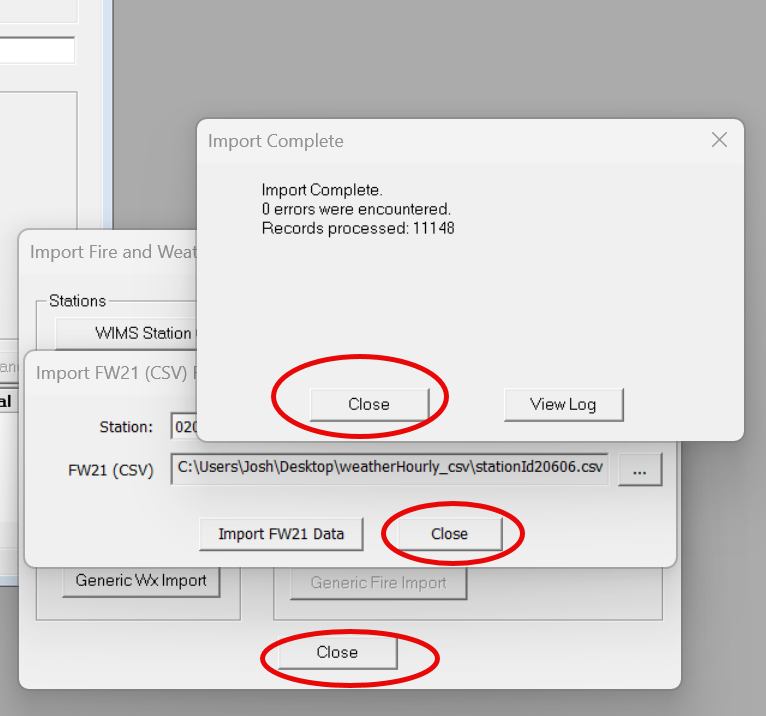
When your data import is complete, close the Notification and both Import panes.
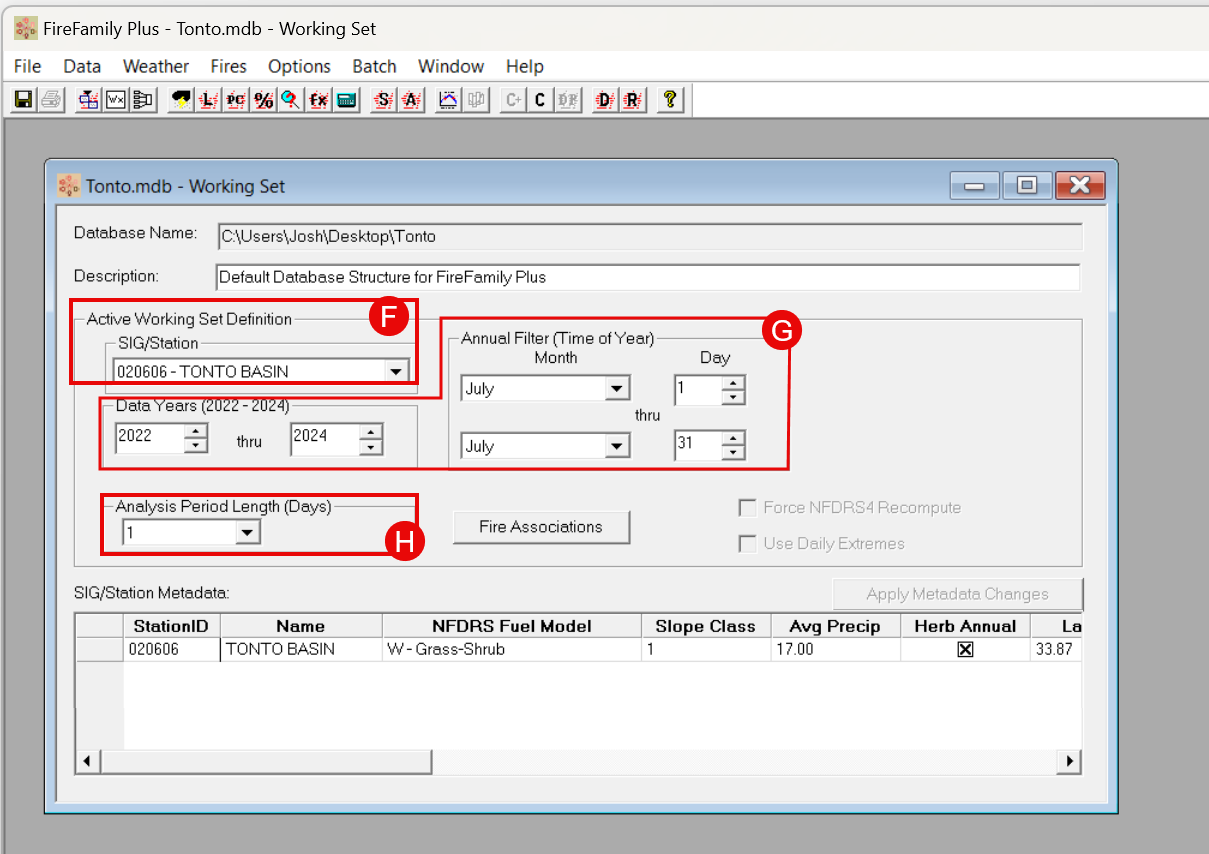
- Select your newly imported data from the SIG/Station dropdown menu.
- Use the date fields to select up to 31 days of data.
-
Make sure Analysis Period Length (Days) is set to “1”.
-
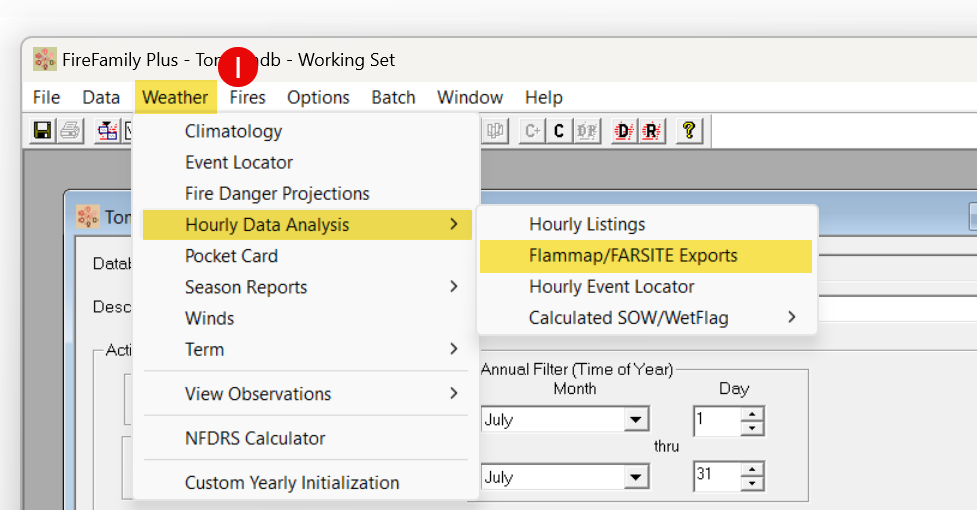
Click the Weather tab from the top menu, hover over Hourly Data Analysis and click Flammap/FARSITE Exports.
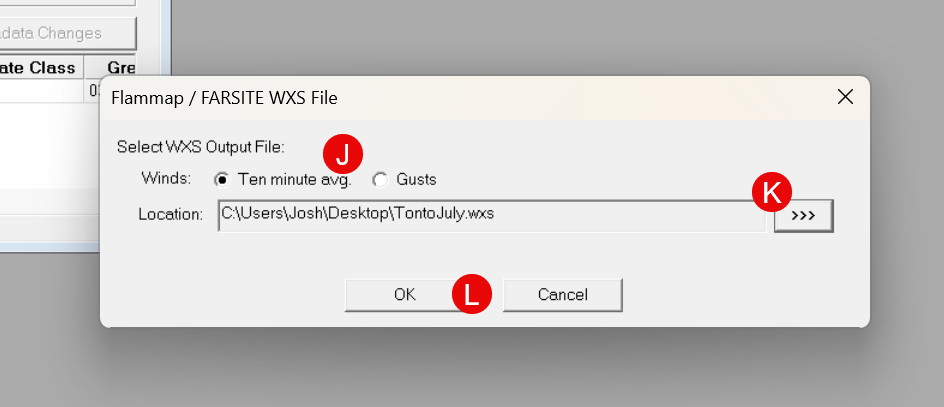
- In the dialogue box that appears, ensure that Ten minute avg is selected for winds.
- Click the location and select where you want to save your new file, and give it a name.
-
Click “OK."
-
The WXS file is now created, you may close Fire Family Plus. The newly created .wxs is available on your local machine for use in IFTDSS.
