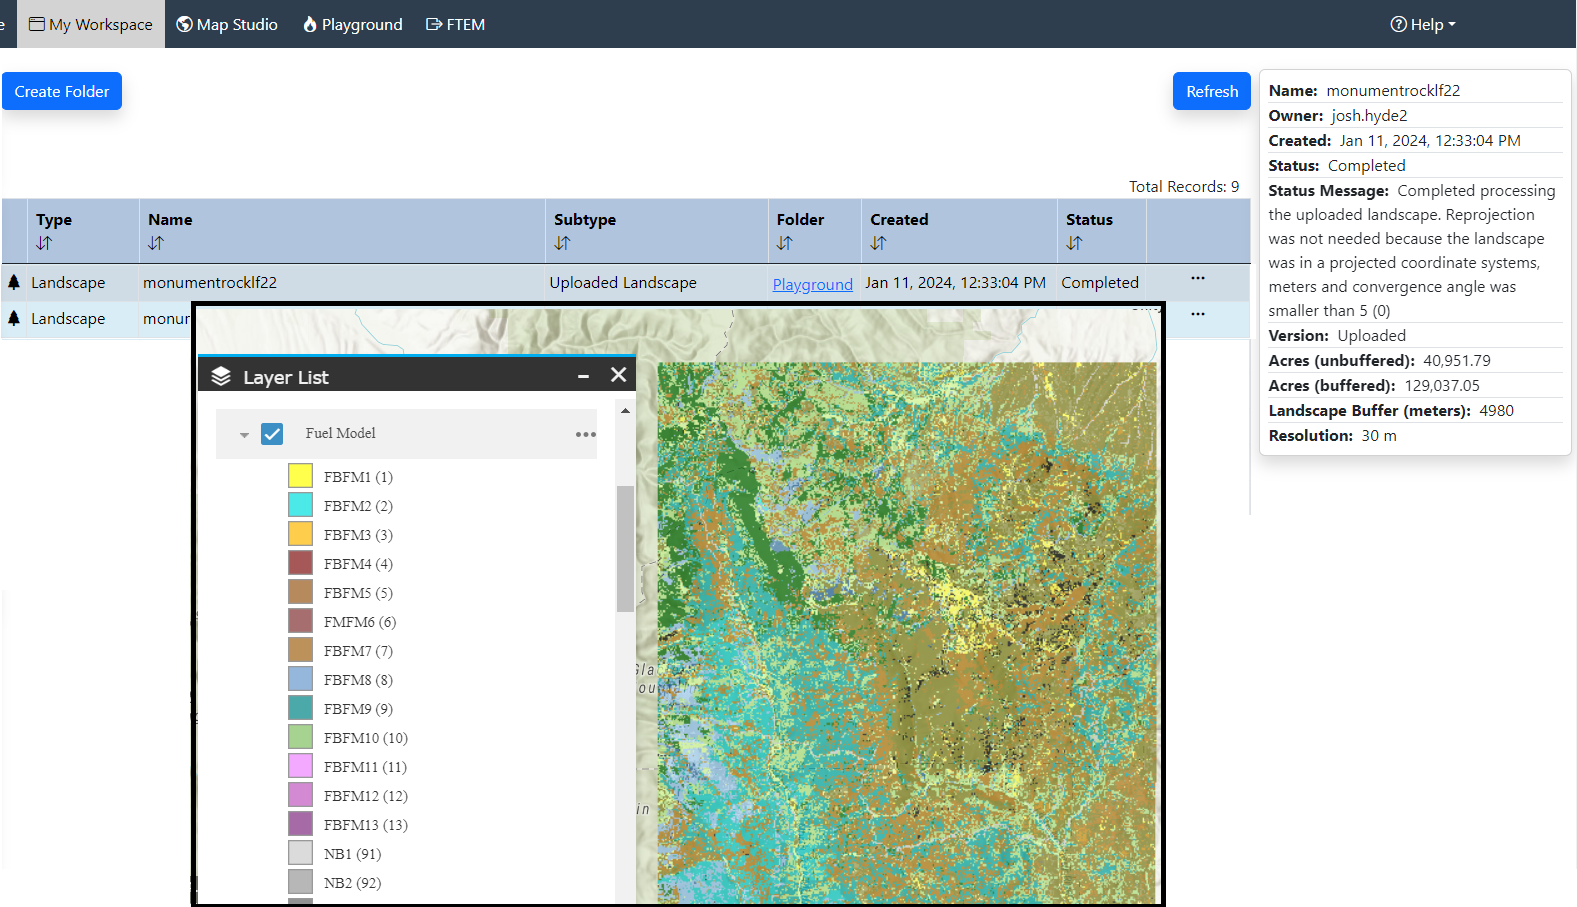
Tip: Large landscapes may take several minutes to upload.
To upload a landscape and save it to IFTDSS:
-
Ensure your landscape meets the criteria to be uploaded to IFTDSS.
-
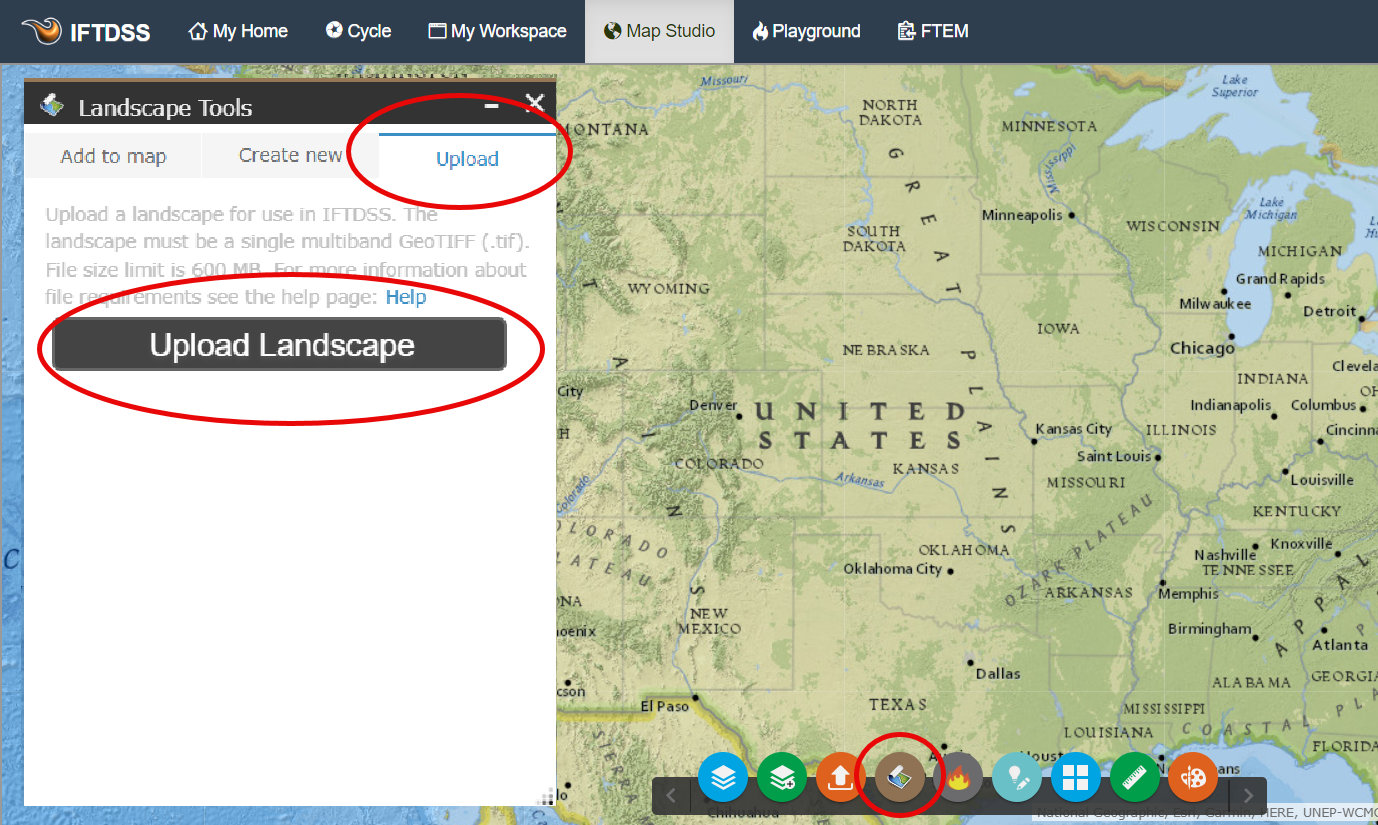
From the Map Studio Landscape Tools
 widget, select the Upload tab and click Upload Landscape.
-
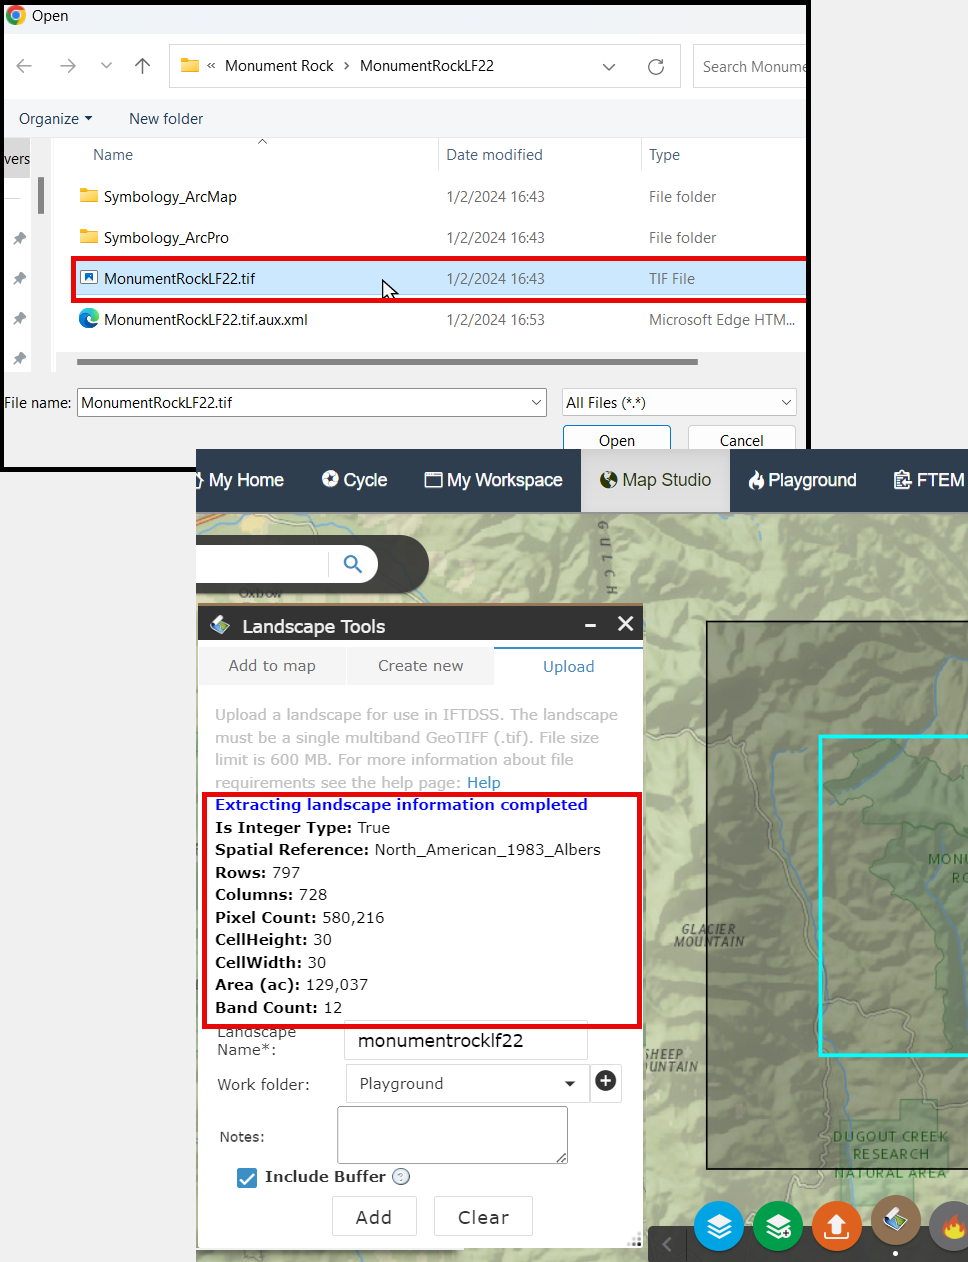
Select your landscape GeoTIFF from your computer. A summary of landscape information will appear under the upload tab.
-
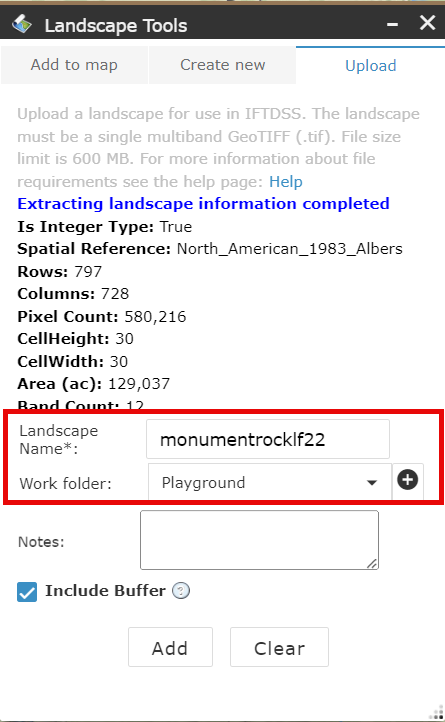
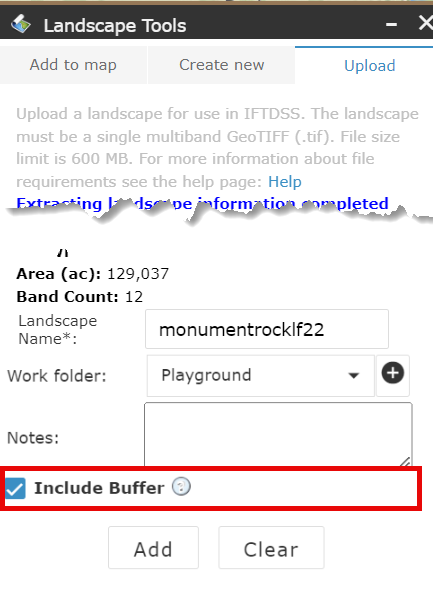
Choose a Landscape name and folder in which to store the new landscape.
-
(Optional) Add any notes you'd like to include about this landscape. Notes may be viewed in My Workspace by selecting the model run and viewing the right hand metadata panel.
-
Choose whether or not to include a buffer in the landscape.
If the "Include buffer" box is checked:
-
Approximately 3 miles of the outer edges of the landscape will be designated a buffer.
-
Buffering is necessary to run Landscape Burn Probability (LBP) modeling or the workflows that require LBP modeling such as Risk Assessment.
-
The buffered area will NOT included in summary report statistics (such as Auto97th reports).
If the "Include buffer" box is NOT checked:
-
Your landscape will not be buffered.
-
Unbuffered landscapes cannot be used for Landscape Burn Probability (LBP) modeling or the workflows that require LBP modeling such as Risk Assessment.
-
Unbuffered landscapes are designed with an "NB" at the end of the file name when displayed in IFTDSS.
-
-
Click Add. You can check the upload status by clicking the landscape in My Workspace and viewing the status in the right hand metadata panel. Once complete, the landscape will be available in My Workspace and landscape dropdowns throughout IFTDSS.
Important! If a landscape fails to upload, the reason will be displayed in the right-hand metadata panel in My Workspace when the landscape is selected.
