Creating Areas of Interest
To create an Area of Interest (AOI), or polygon, you'll first adjust the layer visibility to make it easier to identify the areas on which you'd like to focus:
Tip: If you would prefer to follow this tutorial using the exact shape depicted in the examples, you may download “GraniteCrkProposedTreatmentAreas.zip” to your computer. Once downloaded, open the Upload Shapefile widget![]() in Map Studio, select “GraniteCrkProposedTreatmentAreas.zip” from your computer, then save it as “Granite Creek Proposed Treatment Areas”. This will replace steps A-G below.
in Map Studio, select “GraniteCrkProposedTreatmentAreas.zip” from your computer, then save it as “Granite Creek Proposed Treatment Areas”. This will replace steps A-G below.
- If you have not done so already, open the Basemap Gallery widget
 and change the basemap to “Imagery with Labels” so you can see landscape imagery, then close the Basemap Gallery widget.
 -
Set up the Layer List widget
 to show the 97th percentile fire behavior output layer for "Flame Lengths," and set the transparency so you can see roads and topography as you create your AOI, or treatment area.
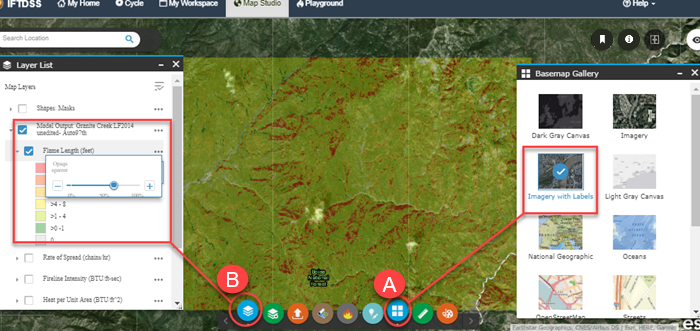
-
Open the Create/Edit Shapes widget
 at the bottom of the screen and ensure Polygons is selected in the dropdown box. You will create two shapes similar to those shown below (they need not match exactly).
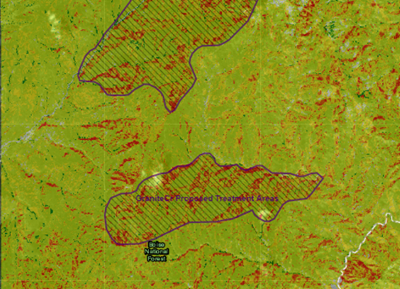
-
In the Create/Edit Shapes widget
, select the Freehand Polygon option, and draw two shapes around the areas of significant fire behavior.
 - Name this “Granite Creek Proposed Treatment Areas”.
- Select the "Granite Creek Treatments" folder. This will ensure the AOI is filed in the same location in My Workspace as all the other Granite Creek project files.
-
Click Create. These two areas are now saved as a single shape and available in the Layer List widget
in Map Studio, as well as in your "Granite Creek Treatments" folder in My Workspace. Close the Create/Edit Shapes widgets.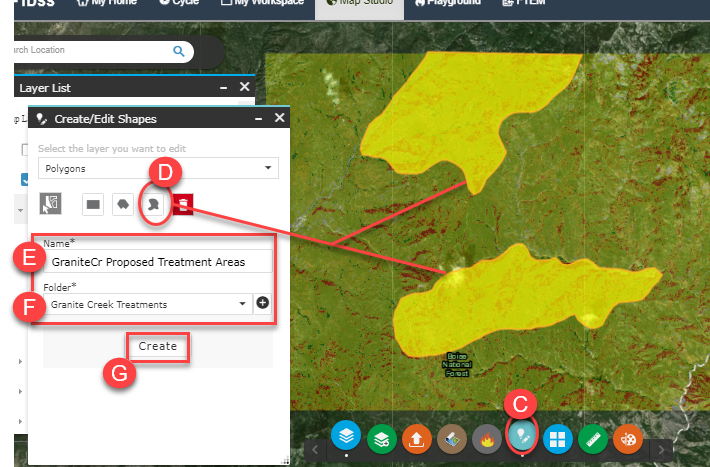
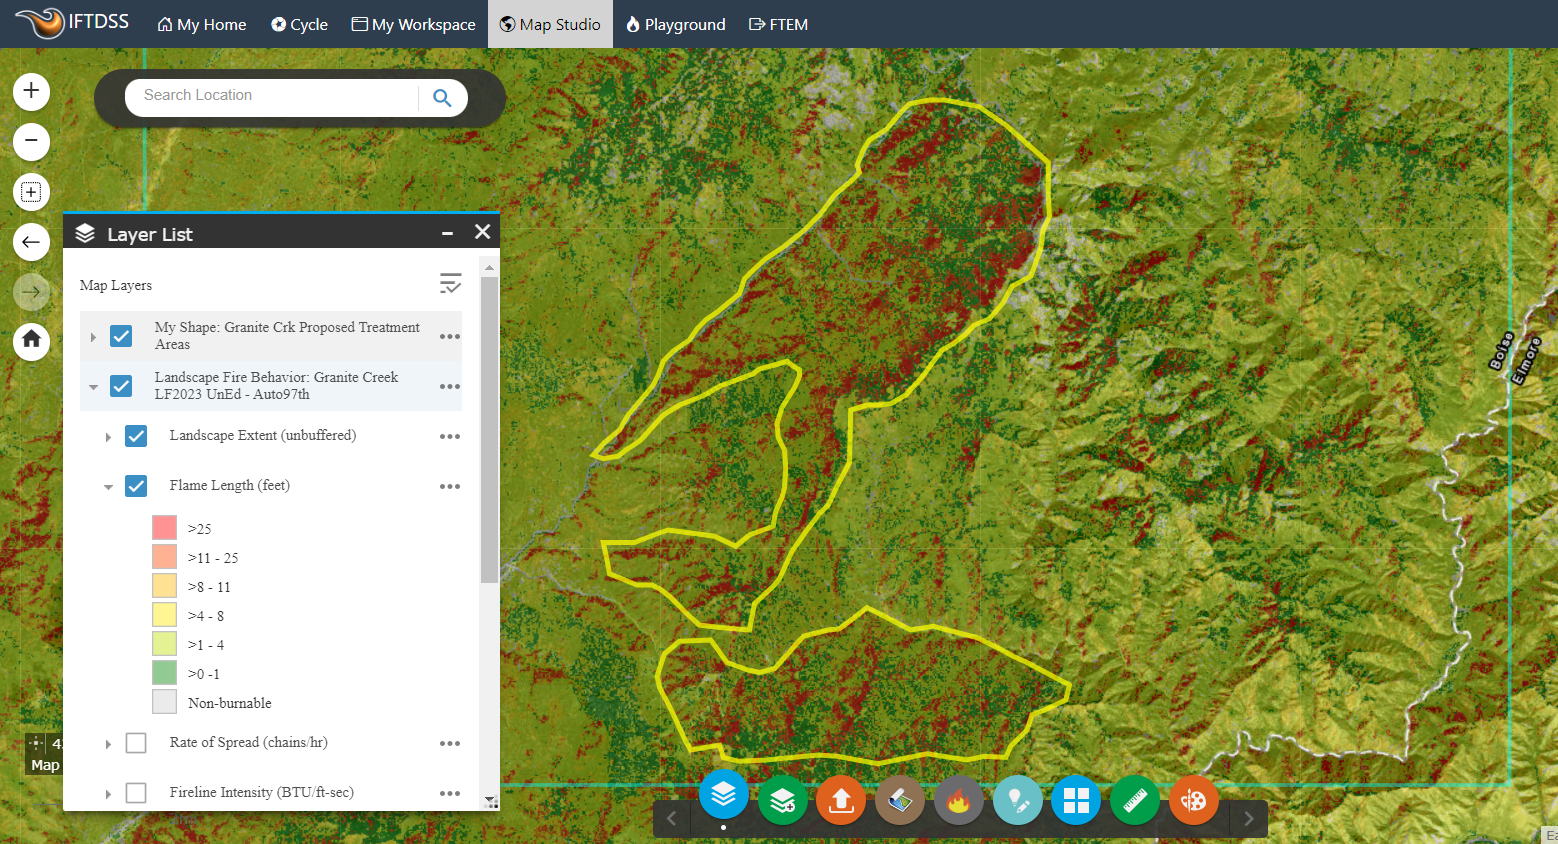
To make the shapes easier to see, locate the shape in Layer List
, click More Options  , and select Change Symbology.
 -
In the "Change Layer Symbology" window, you may change the fill and outline. In this example we've set the fill to be transparent and outline to be yellow and four pixels wide. When finished, click Apply Symbology then Close to apply these changes.

-
Anytime this set of shapes are opened in Map Studio, they will appear with this symbology.