Introduction
Landscapes in IFTDSS are supplied by LANDFIRE. When you create a landscape with Map Studio's Landscape Tools for example, data is pulled from LANDFIRE to create a copy of that LANDFIRE landscape in IFTDSS. You may use the landscape as-is, or you may make edits to the landscape if what you are seeing does not match the conditions you know to be true on the ground.
Landscapes in IFTDSS are LCP files necessary to run several models in IFTDSS. Landscapes are stored in My Workspace and are available from dropdown menus throughout IFTDSS whenever a landscape is required. Landscapes in IFTDSS may be:
Creating Landscapes in IFTDSS
All landscapes will be created with a 4980 meter buffer around them to facilitate using models such as Landscape Burn Probability. This buffer area is not included in summary reports, nor does is count against the 12 million acre size limit.
Important! The maximum area for a landscape is 12 million acres.
The most common way to create a landscape is from Map Studio, using the Landscape Tools widget ![]() .
.
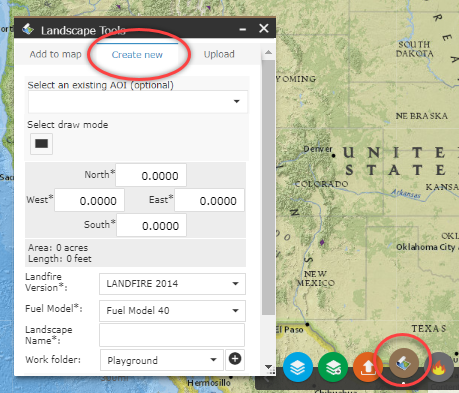
In the Create new tab specify the requirements for your landscape:
- Use the Map Studio widgets such as Zoom, Basemap Gallery, and so forth to locate your desired area.
-
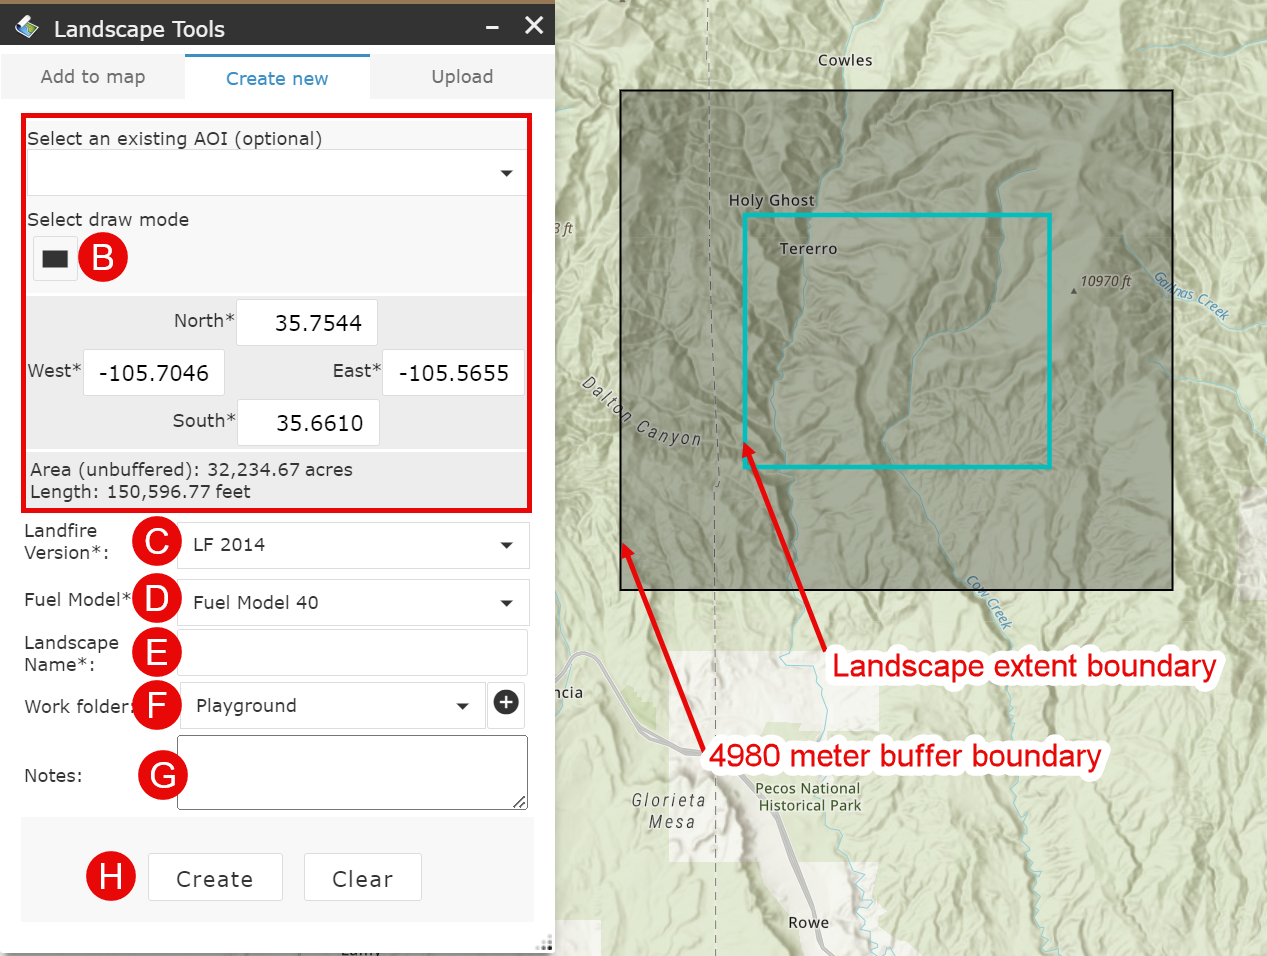
Define the area of your new landscape by doing one of the following:
-
Selecting an Area of Interest from the dropdown menu (this contains any shapes you've created or shapefiles you've uploaded).
Important! Your shape or shapefile must be within your current map extent to appear in the dropdown menu, so zoom in or out in Map Studio as needed.
- Click Select draw mode
 , mouse to your location on the map, hold down the left mouse key, and draw a rectangle around your desired area, releasing the button when you are finished.
 - Enter exact coordinates, in degrees, for the west, east, south, and north bounds of your desired area.
-
- Choose the version of LANDFIRE data you would like to use.
- Choose the fire behavior fuel model (Fuel Model 40 or Fuel Model 13) to include in your landscape file.
- Give your landscape a descriptive name. This is helpful as you accumulate more landscape files, and when using the dropdown menus throughout IFTDSS, which often only display the landscape name not the folder in which its stored. Spaces are allowed in names and we recommend including the LANDFIRE version and keeping the name less than 30 characters. For example, "Smith Project LF14."
- Select the folder to store your landscape file. If needed, you may use the Add New Folder
 button to create a new folder for your landscape. If you do not specify an existing folder or create a new one in this step, your saved landscape defaults to the "Playground" folder of My Workspace.
 -
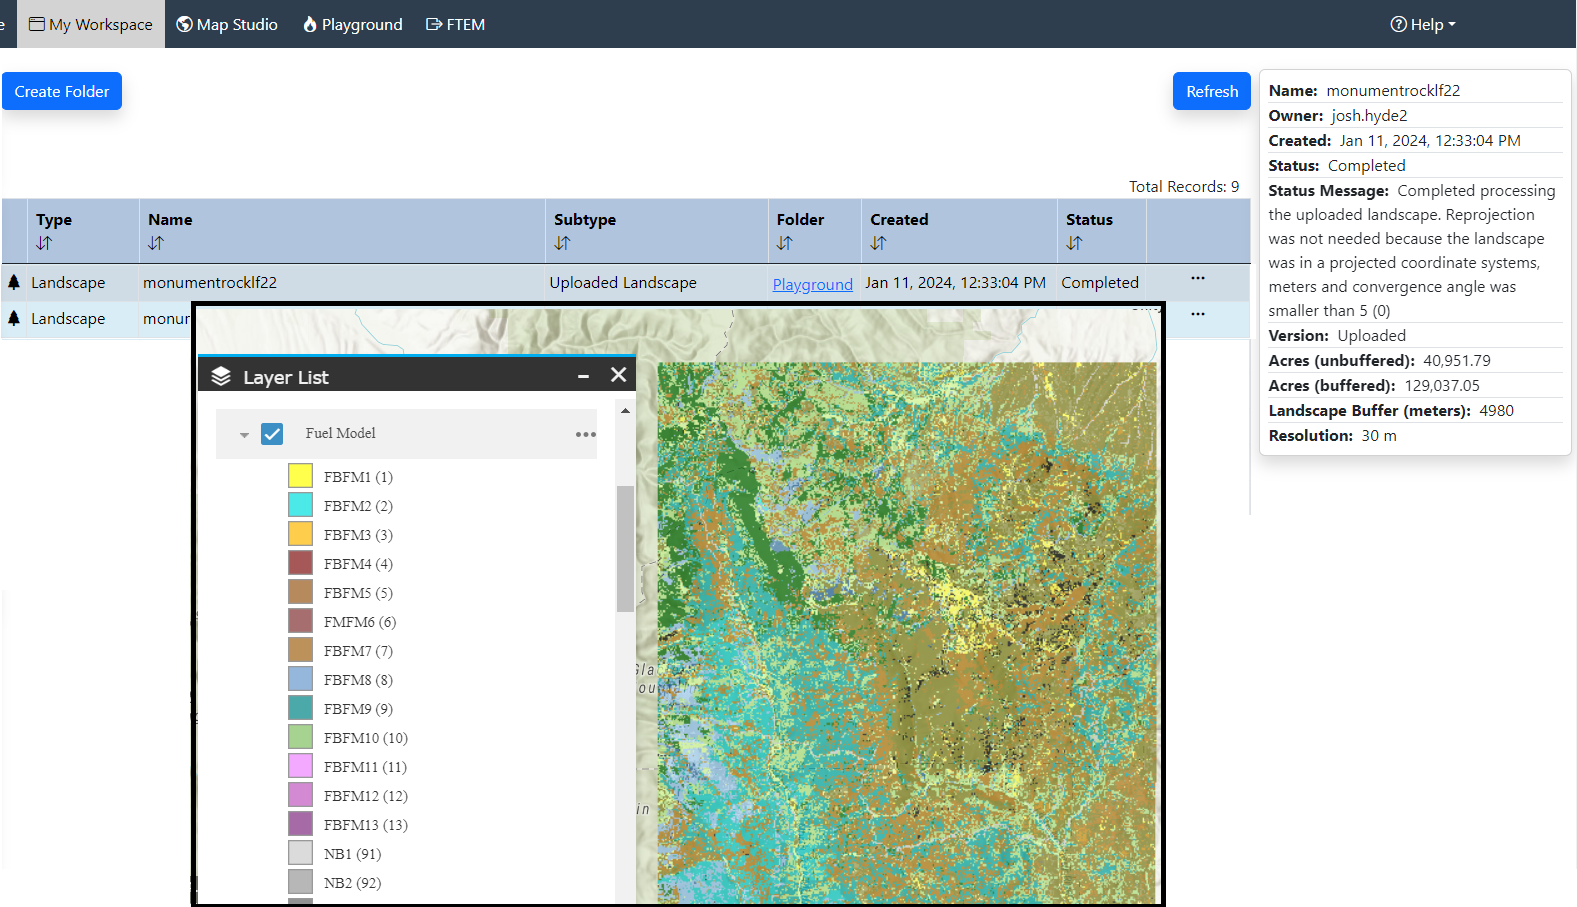
(Optional) Add any notes you'd like to include about this landscape. Notes may be viewed in My Workspace by selecting the model run and viewing the right hand metadata panel.
-
Click Create to generate your landscape file.
Important! The maximum area for a landscape is 12 million acres.
Your landscape extent will be indicted by a turquoise border, and surrounded by a 4980 meter buffer indicated with a black border.
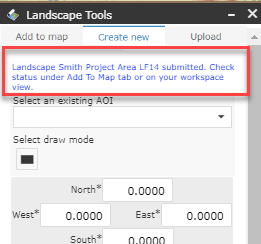
Once you click Create a message appears at the top of the Landscape Tools widget ![]() to confirm your landscape is being created. It may take a few minutes to generate your landscape. You may check its status by going to the "Add to Map" tab of the Landscape Tools widget
to confirm your landscape is being created. It may take a few minutes to generate your landscape. You may check its status by going to the "Add to Map" tab of the Landscape Tools widget ![]() and using the Refresh button. Once complete, check the box next to the landscape to add it to the Layer List widget
and using the Refresh button. Once complete, check the box next to the landscape to add it to the Layer List widget ![]() .
.
Important! A maximum of six landscape requests may be submitted at any given time. If you see a pop-up notifying you that this number has been exceeded, complete your task when one of the other requests has completed.
Uploading Landscapes to IFTDSS
-
Ensure your landscape meets the criteria to be uploaded to IFTDSS.
-
From the Map Studio Landscape Tools
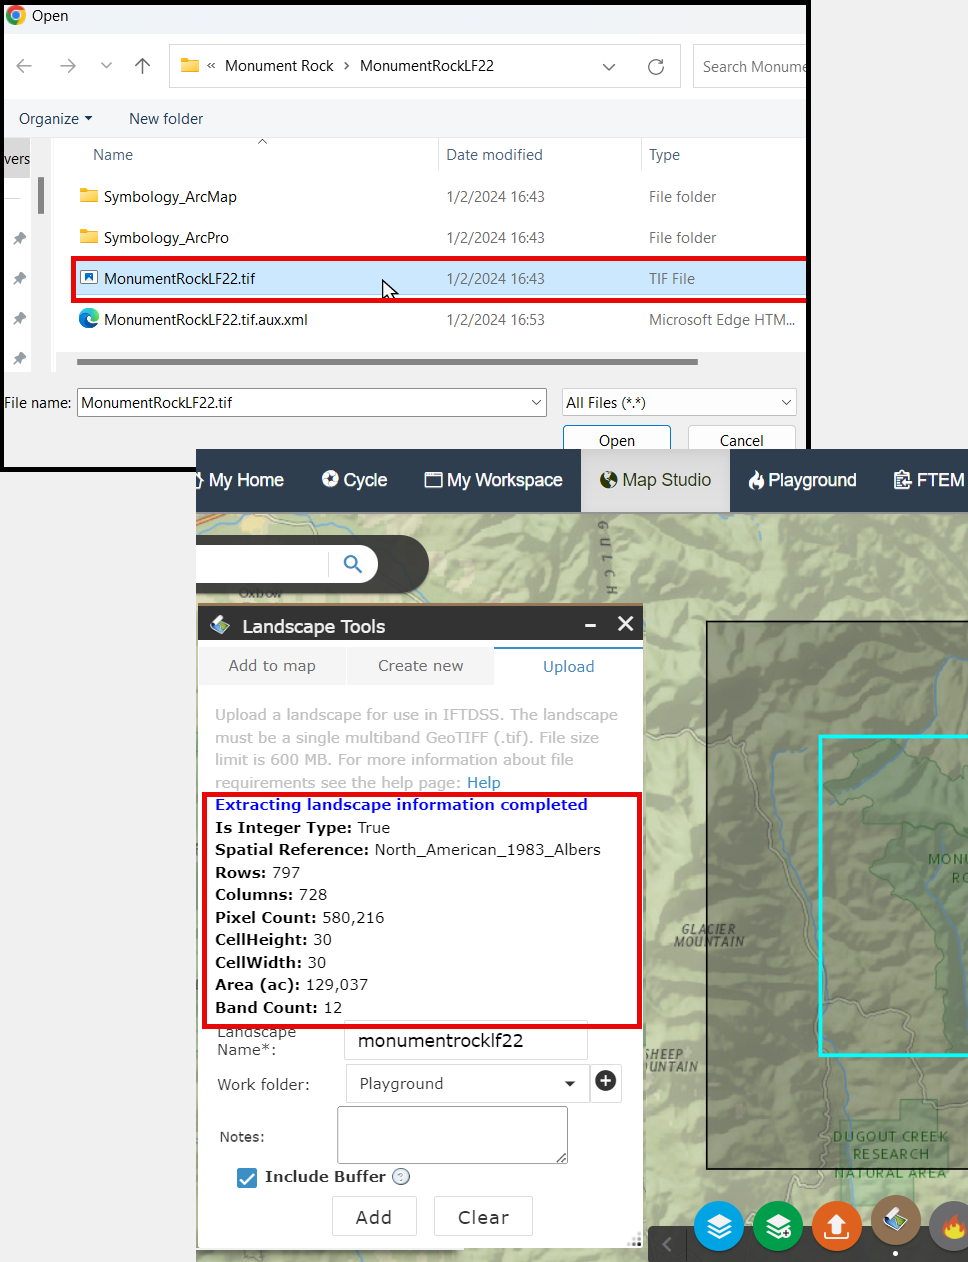
 widget, select the Upload tab and click Upload Landscape.
-
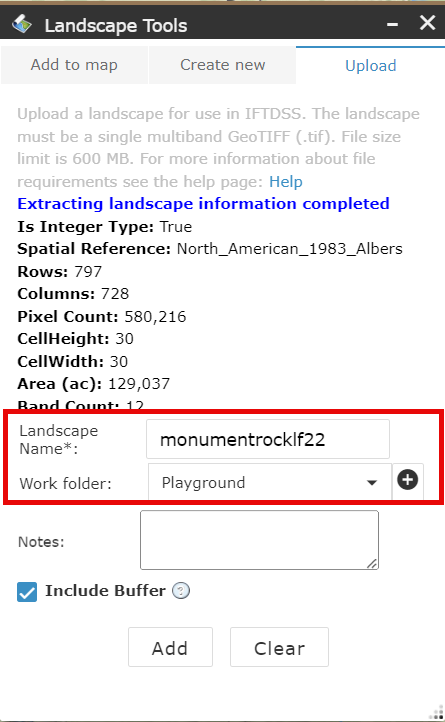
Select your landscape GeoTIFF from your computer. A summary of landscape information will appear under the upload tab.
-
Choose a Landscape name and folder in which to store the new landscape.
-
(Optional) Add any notes you'd like to include about this landscape. Notes may be viewed in My Workspace by selecting the model run and viewing the right hand metadata panel.
-
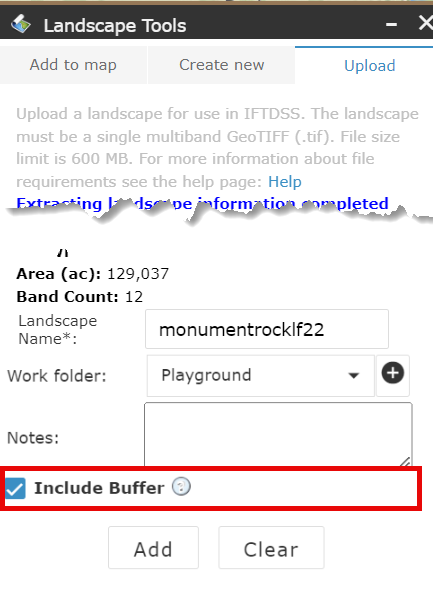
Choose whether or not to include a buffer in the landscape.
If the "Include buffer" box is checked:
-
Approximately 3 miles of the outer edges of the landscape will be designated a buffer.
-
Buffering is necessary to run Landscape Burn Probability (LBP) modeling or the workflows that require LBP modeling such as Risk Assessment.
-
The buffered area will NOT included in summary report statistics (such as Auto97th reports).
If the "Include buffer" box is NOT checked:
-
Your landscape will not be buffered.
-
Unbuffered landscapes cannot be used for Landscape Burn Probability (LBP) modeling or the workflows that require LBP modeling such as Risk Assessment.
-
Unbuffered landscapes are designed with an "NB" at the end of the file name when displayed in IFTDSS.
-
-
Click Add. You can check the upload status by clicking the landscape in My Workspace and viewing the status in the right hand metadata panel. Once complete, the landscape will be available in My Workspace and landscape dropdowns throughout IFTDSS.
Important! If a landscape fails to upload, the reason will be displayed in the right-hand metadata panel in My Workspace when the landscape is selected.