Below you will find step by step instructions for running the LBP model.
Tip: IFTDSS can process a limited number of LBP runs at a time. You can check your run queue position in My Modeling Playground.
Select the model
Navigate to the Landscape Burn Probability inputs page either:
-
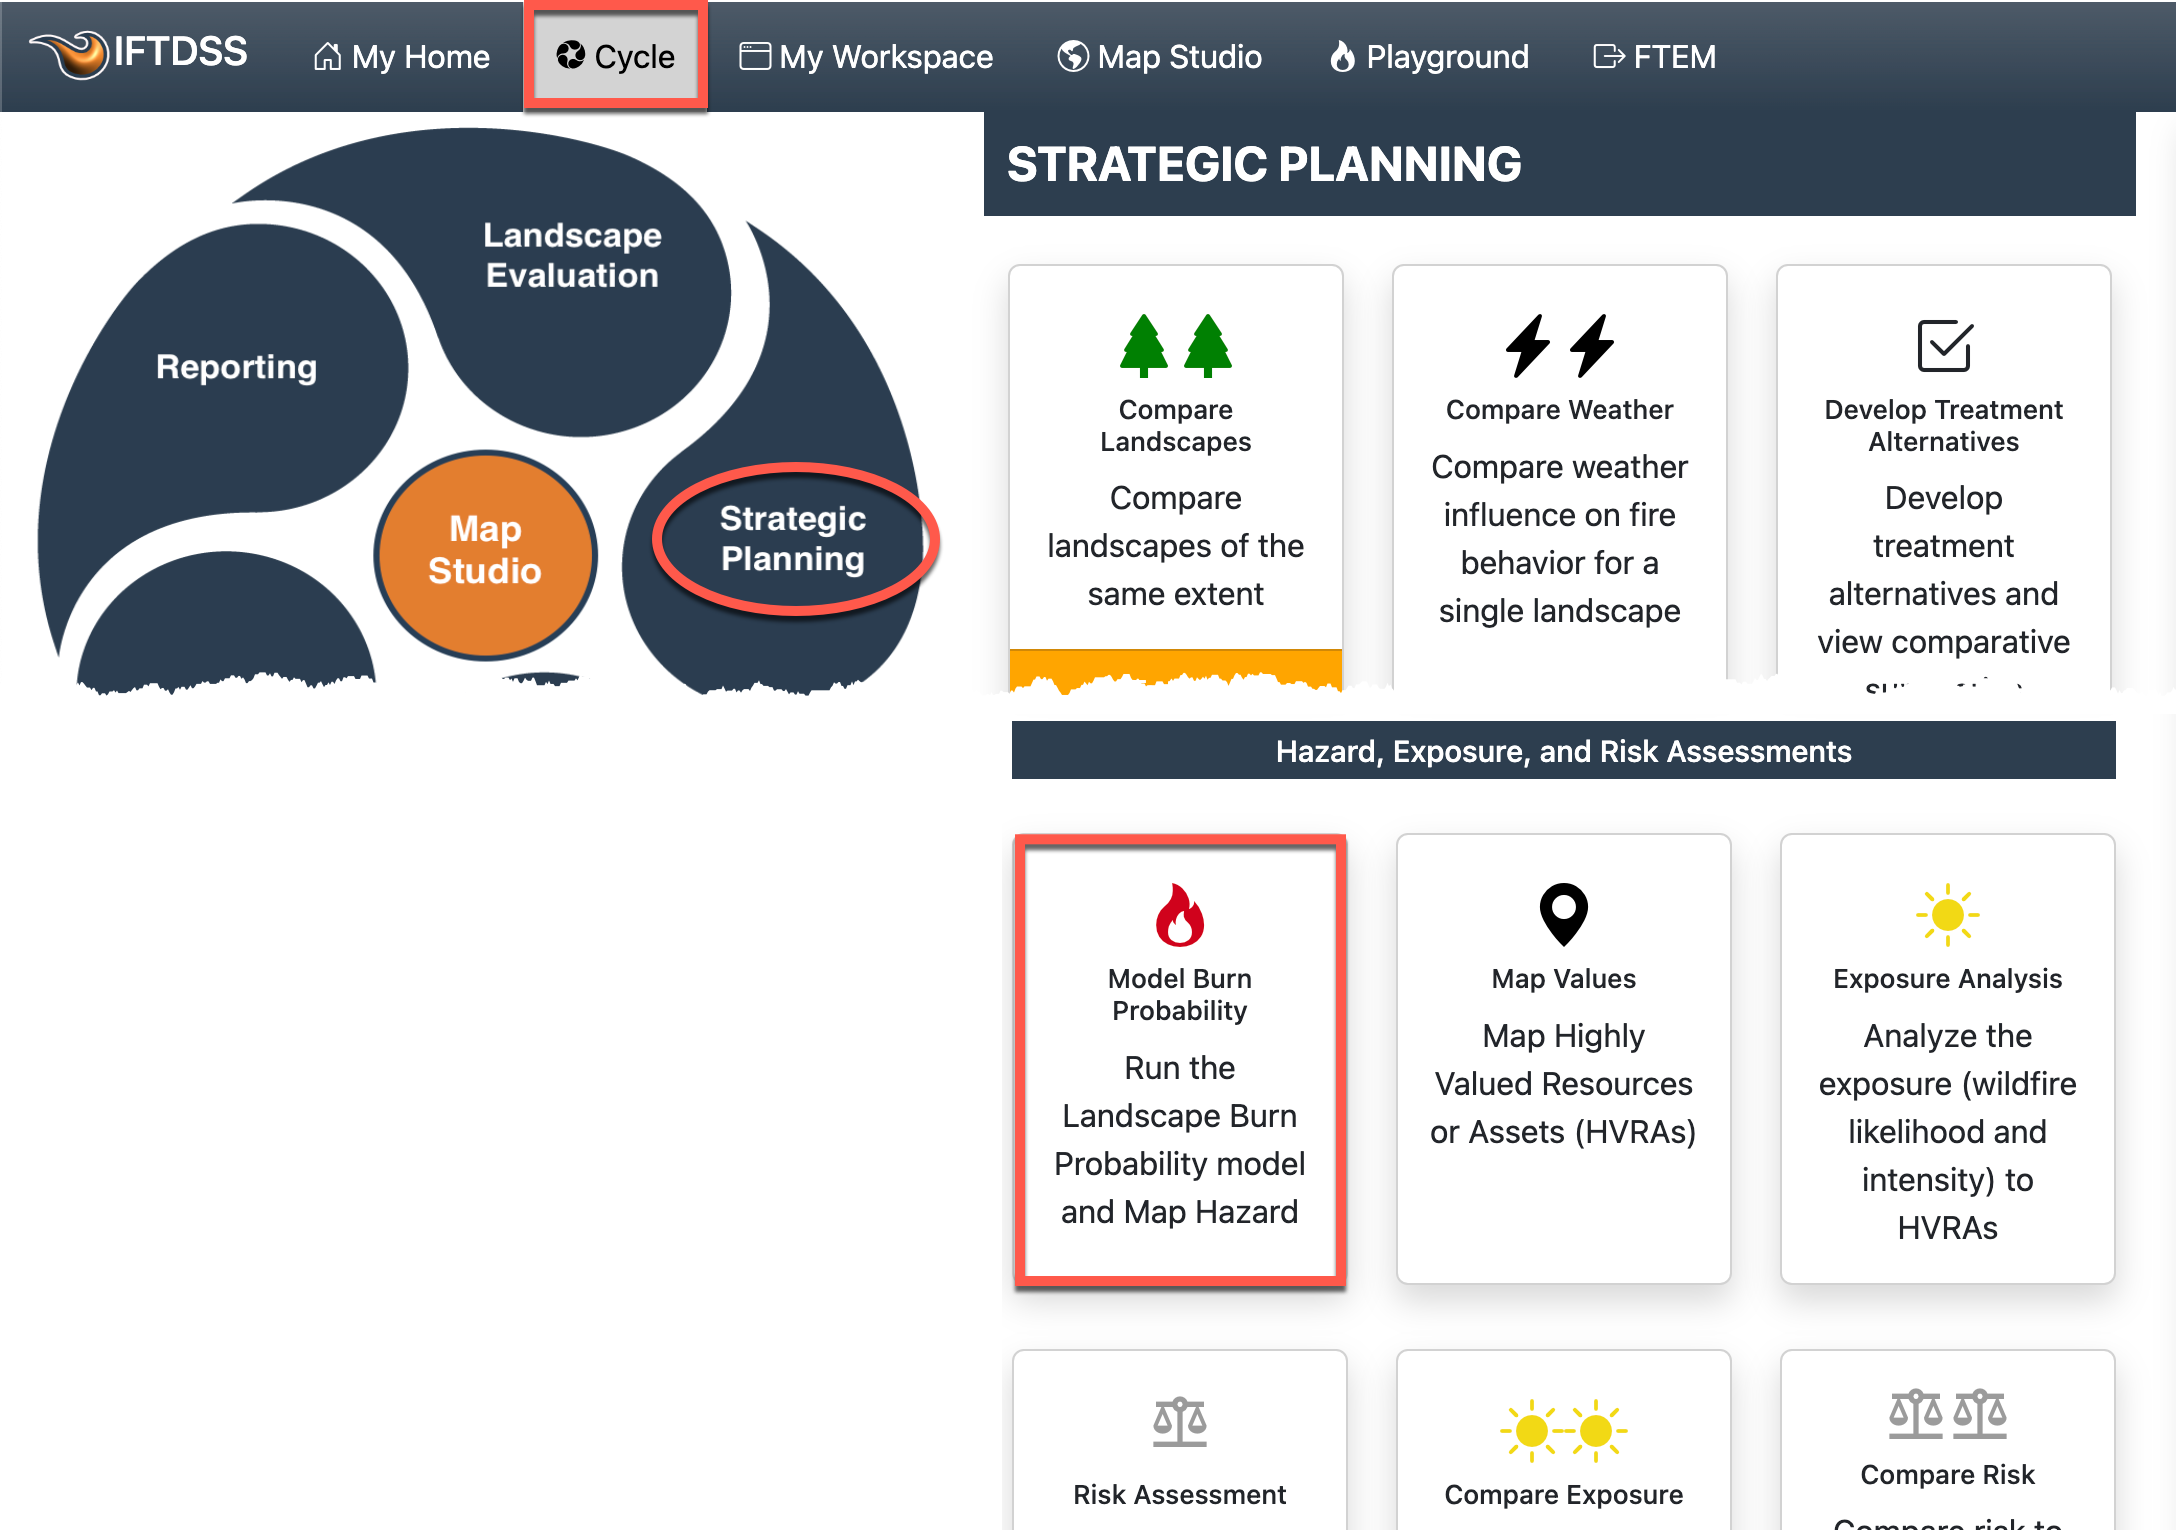
From the Cycle, by clicking on the Strategic Planning stage, and then the Model Burn Probability task,
-
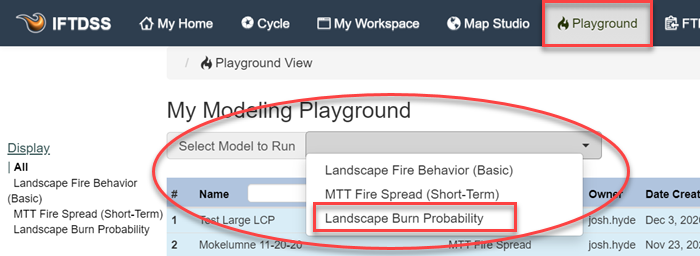
Or from the My Modeling Playground, open Select Model to Run in the top left, select Landscape Burn Probability from the dropdown menu, and click Create Run.
Populate the Model Inputs
-
Choose a landscape for your run from the dropdown list. If you have not created a landscape, you may use the Create New Landscape
 button to the right to either create a landscape or upload an existing landscape.
-
Choose whether to manually enter weather and fuel moisture values for the model, generate values using the closest weather station to your landscape, or pick a specific weather station from which to generate values. Any values applied in this step can still be edited or replaced.
See the Fire Environment Mapping System (FEMS) weather topic to learn more about each method.

-
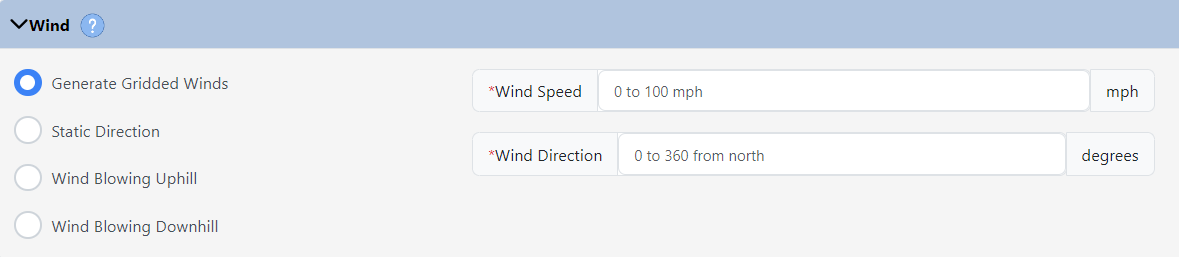
Select a wind option, gridded is the default and best for complex terrain. Other options include static (one direction across the entire landscape), winds blowing uphill, or winds blowing downhill.
Specify windspeed in miles per hour, 20 feet above the ground or above the vegetation. Enter wind direction as the direction the wind is blowing from (in degrees clockwise from north, with north being 0 or 360 degrees).
-
Specify a crown fire calculation method from the dropdown menu, and specify the foliar moisture content (in percent).

-
Specify initial fuel moisture, in percent, for:
- 1 hour fuels (1hr FM) - allowed values 2-40
- 10 hour fuels (10hr FM) - allowed values 2-40
- 100 hour fuels (100hr FM) - allowed values 2-40
- Herbaceous fuels (Herb FM) - allowed values 30-300
-
Live Woody fuels (WoodyFM) - allowed values 60-300
If you choose to only populate one row, those fuel moistures will be applied to all fuel models in your landscape.
(Optional) If you would like to specify differing fuel moisture values for individual fuel models, click + add row. This will add a new line. Using the dropdown list, choose a fuel model then specify the fuel moisture values for that model. You may repeat this for as many individual fuel models as needed.

For more guidance on choosing fuel moistures see the Estimating Fuel Moistures topic.
-
Select a Fuel Moisture Conditioning method. If you choose not to condition, your initial fuel moistures from the previous step will be used throughout the landscape.
If you choose to condition your fuels to account for landscape features and weather, use one of the conditioning options below:
-
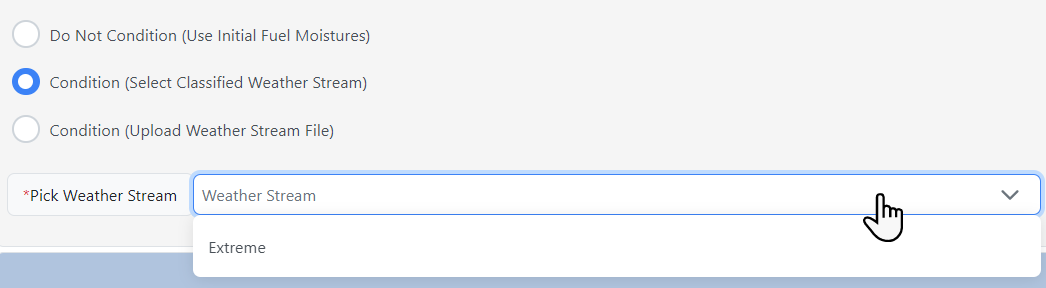
Condition (Select a Classified Weather Stream): Uses an automatically generated weather stream for extreme conditions (based on static pyrome data). Currently Extreme is the only option available in the dropdown menu.
-
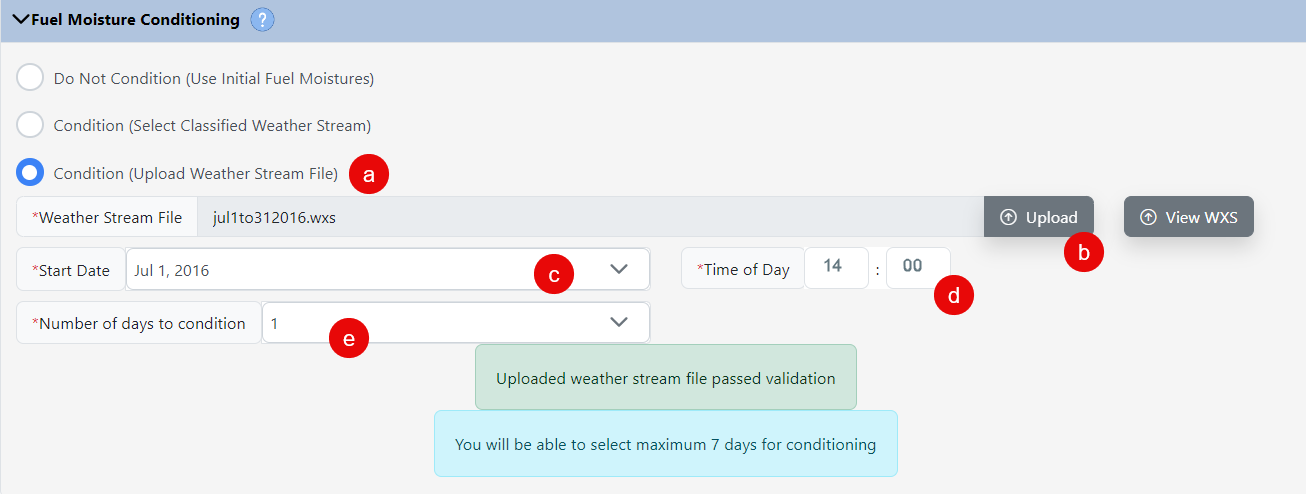
Condition (Upload Weather Stream File): Conditions based upon a weather stream file you upload, following the steps below:
- Click the Condition (Select Classified Weather Stream) button.
- Click the Upload button and select a .wxs file from your local machine.
- Select a start date from the dropdown menu on which the conditioning period begins.
- Enter a time (in 24 hour hhmm format) on which to start and end conditioning.
-
From the Number of days to condition dropdown menu, select a period for fuel conditioning, up to 7 days.
View the WXS topic for instructions on creating a .wxs file.
-
Condition (FEMS Weather Stream): This option uses a FEMS weather stream and is available if you selected a Weather Station in previous steps. This selection conditions based on your selected weather station, a specified start date and time, and number of days to condition (up to seven).

-
-
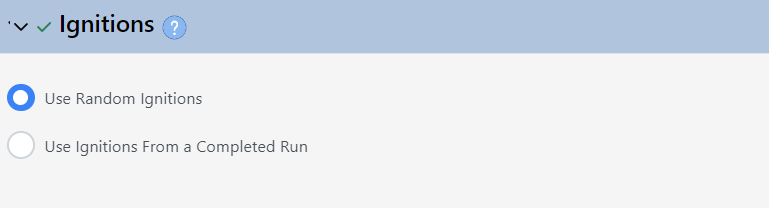
Specify whether you want the model to simulate random ignitions (default choice), or select a set of random ignitions from a previous LBP run (useful when you're trying to re-create an LBP run to compare treatments, etc.).
Important! If Landscape Burn Probability (LBP) models are run for use with Compare Weather, select the "Use Ignitions From a Complete Run" option when creating subequent model runs to ensure they are available when using Compare Weather.
-
Specify a Simulation Time (Burn Period Length), from 4-12 hours. Because inputs should represent “problem fire” conditions, the duration of the burn period should reflect the active burning period of wildfires of the area under extreme conditions.

-
Choose to either leave the Spotting probability as the default 20% (recommended for many scenarios) or adjust it as needed.

Click here to learn more about Spotting probability.
-
(Optional) Add any notes you'd like to include about this run. Notes may be viewed in My Workspace by selecting the model run and viewing the right hand metadata panel.

-
Give your run a descriptive name.
-
(Optional) If you choose to save your inputs and complete and run at a later time, click Save. The Update button will appear. You may then choose to navigate to another part of IFTDSS, or click the Update button to resume editing. If you choose to navigate away and return at a later time, you may select the model in modeling playground and click the Edit option to resume your work.
-
Click Run to begin the model run. Once run, your model output will be available in My Modeling Playground and My Workspace.

Important! You may only have three LBP runs submitted at any given time. If you attempt to submit a fourth run, a notice will appear on the screen to alert you. If this occurs, save your run inputs by clicking the Save button, and submit the run when one of the other three has completed.
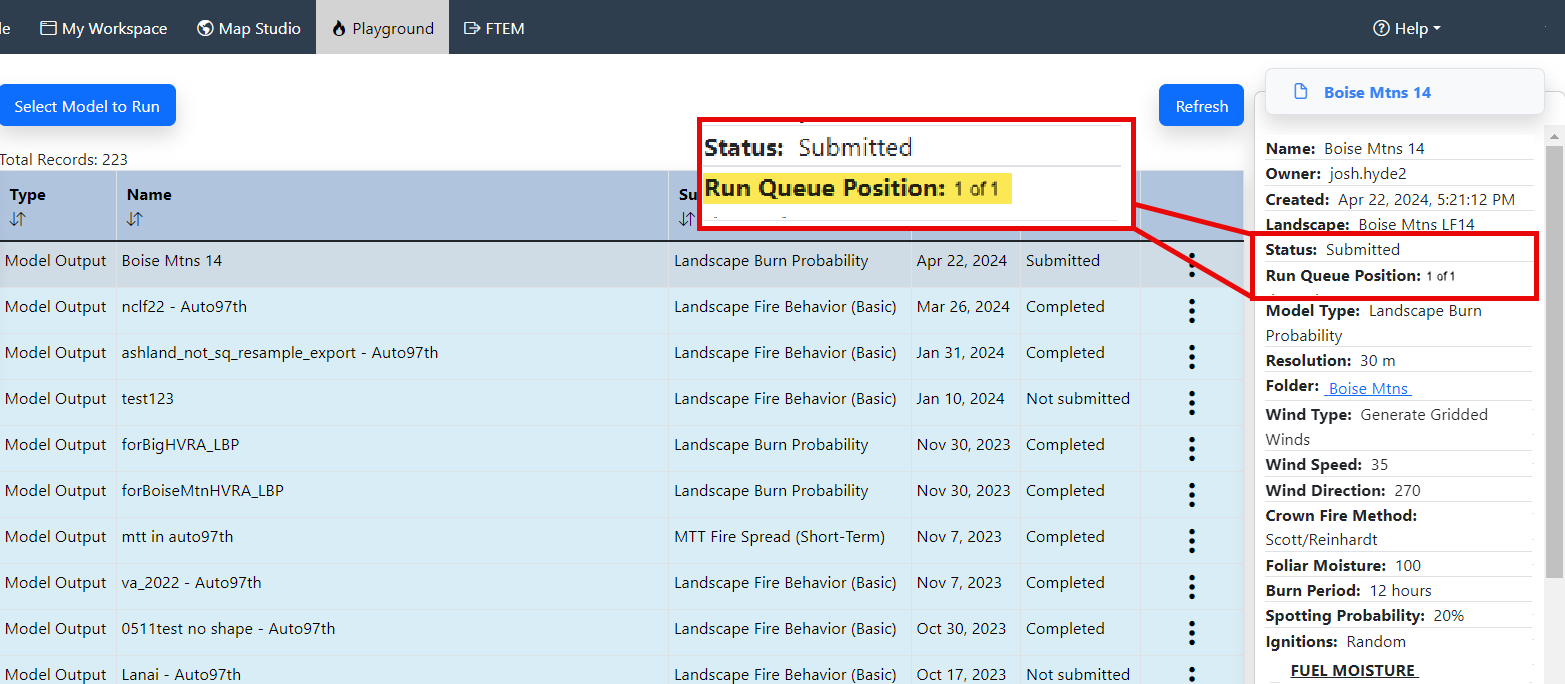
To Check your run queue position: You can check where "in line" your run is by clicking on the run name in My Modeling Playground, and referring to the "Run Queue Position" in the right hand panel.
Model Outputs
Model outputs for Landscape Burn Probability, their units, and links to in-depth descriptions are listed below.
| Output | Brief Description | Map Studio Units | Report Units | Download Units |
|---|---|---|---|---|
| Burn Probability | The likelihood that a fire will burn a given point on the landscape (expressed as a value between 0 and 1). See Burn Probability for more detail. | proportion | proportion | proportion |
| Conditional Flame Length | The mean flame length of all the fires that burn a given point on the landscape. See Conditional Flame Length for more detail. | feet | feet | feet |
| Integrated Hazard | The combination of Burn Probability and Conditional Flame Length class ranging from lowest probability/lowest conditional flame lengths to highest probability/highest conditional flame lengths. See Integrated Hazard for more detail. | categorical | categorical | categorical |
| Proportion of Flame Lengths 0-2 ft | The probability of fire burning with a flame length between >0 and 2 ft (expressed as a value between 0 and 1). See Flame Length Probability for more detail. | N/A | N/A | proportion |
| Proportion of Flame Lengths 2-4 ft | The probability of fire burning with a flame length between >2 and 4 ft (expressed as a value between 0 and 1). See Flame Length Probability for more detail. | N/A | N/A | proportion |
| Proportion of Flame Lengths 4-6 ft | The probability of fire burning with a flame length between >4 and 6 ft (expressed as a value between 0 and 1). See Flame Length Probability for more detail. | N/A | N/A | proportion |
| Proportion of Flame Lengths 6-8 ft | The probability of fire burning with a flame length between >6 and 8 ft (expressed as a value between 0 and 1). See Flame Length Probability for more detail. | N/A | N/A | proportion |
| Proportion of Flame Lengths 8-12 ft | The probability of fire burning with a flame length between >8 and 12 ft (expressed as a value between 0 and 1). See Flame Length Probability for more detail. | N/A | N/A | proportion |
| Proportion of Flame Lengths >12 ft | The probability of fire burning with a flame length between >12 ft (expressed as a value between 0 and 1). See Flame Length Probability for more detail. | N/A | N/A | proportion |
| 1-hr Fuel Moisture | Moisture content of 1-hour fuel (dead woody fuel 0 to ¼ inch or 0 to 6.4 mm in diameter) is the mass of water within the fuel particle expressed as a percentage of the fuel particle’s oven-dry mass. See Fuel Moisture for more detail. | percent | N/A | percent |
| 10-hr Fuel Moisture | Moisture content of 10-hour fuel (dead woody fuel ¼ to 1 inch or 0.6 to 2.5 cm in diameter) is the mass of water within the fuel particle expressed as a percentage of the fuel particle’s oven-dry mass. See Fuel Moisture for more detail. | percent | N/A | percent |
| 100-hr Fuel Moisture | Moisture content of 100-hour fuel (dead woody fuel 1 to 3 inches or 2.5 to 7.6 cm in diameter) is the mass of water within the fuel particle expressed as a percentage of the fuel particle’s oven-dry mass. See Fuel Moisture. for more detail. | percent | N/A | percent |
| Midflame Wind Speed | Wind velocity at the midflame height. Calculated using wind adjustment factors based on stand height and canopy cover and the Wind Speed. See Midflame Wind Speed for more detail. | mph | N/A | mph |
| 20 Ft Wind Speed | Wind velocity measured 20 feet (6 m) above the top of the tree or shrub canopy, or above the ground if canopy is absent. | N/A | N/A | mph |
| 20 Ft Wind Direction | Wind direction is the direction from which the wind is blowing, specified in degrees increasing clockwise from north (which is zero degrees), Uphill or Downhill. | N/A | N/A | degrees |

